Chapter 3: Technical Deep-Dive – Diskless Boot for Debian 12
Early Exploration Notice: This document is an early exploration log. The described approach differs from the current architecture and is provided solely for low-level research reference.
Debian 12 was the first operating system fully conquered by the iPXE-All-Ready project and also the one that presented the most technical obstacles during exploration. This chapter focuses on Debian not only because its low-level boot mechanisms are inherently complex, but also because the deployment process allowed us to thoroughly validate and resolve a set of long-standing engineering pain points.
On the official iPXE mailing list back in 2021, core maintainer Michael Brown, when discussing iSCSI booting for Debian, admitted: “I've tried previously and given up.” Community members also explicitly stated: “For booting from iSCSI/SAN, it seems they don't support it,” and concluded: “There is no way to do this with the standard Debian initrd.”
NOTE
The original purpose of the iPXE-All-Ready project was never to repeat existing routine operations, but to fill this long-standing technical gap.
Solving the entire end-to-end chain for Debian diskless boot was indeed tricky. Yet, after more than a decade since iPXE’s inception, the puzzle of the underlying infrastructure should no longer have this missing piece in 2026. If no one carries out the low-level adaptation and validation, the conclusion of “no way” could continue to persist.
After several days of debugging and deep analysis of the initramfs packaging mechanism, Debian 12 eventually booted successfully from a diskless environment.
3.1 Holistic Analysis: Engineering Challenges and Methodology of Debian Diskless Boot
Before diving into specific deployment paths, it’s necessary to analyze the core engineering challenges of Debian diskless boot from the perspective of the system’s low-level boot mechanisms. Understanding these pain points forms the foundation for mastering the three deployment routes in this chapter and for later adapting other Linux distributions.
Core Challenge Breakdown
The engineering difficulties of Debian diskless boot mainly center around three dimensions: state persistence in the early user space (initramfs), the configuration inheritance mechanism of the installer (d-i), and the addressing stability of network block devices.
- Lack of State Persistence During the Initramfs Stage The Linux kernel boot process requires the initramfs to provide necessary drivers and mount logic before the root filesystem (rootfs) can be mounted. When the root filesystem resides on iSCSI network storage, the initramfs must complete network stack initialization and perform an iSCSI session login at a very early stage. However, Debian’s default
initramfs-toolsframework, when handling a network root filesystem, has built-in hook scripts that fail to automatically capture and package user-defined iSCSI connection parameters, and also fail to forcibly include necessary kernel modules (e.g.,iscsi_tcp) and user-space tools (e.g.,iscsistart). This mechanism flaw means the kernel cannot establish a storage connection during the initramfs stage, ultimately triggering aVFS: Unable to mount root fserror. - Configuration Inheritance Gap in the Installer (d-i) The official Debian network installer (d-i) has the ability to discover and log into an iSCSI Target during the deployment phase, thereby writing system files to the network LUN. However, when handing control to the local system after deployment, the iSCSI session parameters and network configuration established during the installation phase are not correctly persisted into the target system’s initramfs configuration. Additionally, the standard netboot process has limitations in package selection (e.g., binding to a specific desktop environment), making it difficult to adapt to highly customized deployment needs.
- Topology Drift and Addressing Failure of Network Block Devices In an iSCSI storage topology, the enumeration order of block devices is influenced by network latency, session establishment timing, and controller scan order. Device node paths (e.g.,
/dev/sda) are highly volatile across system reboots or hardware topology changes. If the target system’s/etc/fstabrelies on a static device path to mount the root partition, it will directly lead to a boot failure. Therefore, it is mandatory to use the filesystem UUID or PARTUUID as the mount identifier.
Engineering Positioning of the Three Routes
Addressing the above challenges and various business scenarios, this chapter provides three independent deployment routes. Each route forms a complete closed loop, aiming to solve the problems of system construction and initramfs repair from different dimensions.
- Route 1: Based on the Official netboot Installer This route aims to reproduce and verify the standard network installation process. Through hands-on operation, one can directly observe the behavior of the official installer in an iSCSI environment, verify the problem of lost initramfs configuration after installation, and then repair it via
chroot. - Route 2: Virtual Machine Image Conversion and Customization When the target system requires a complex desktop environment, proprietary software stacks, or specific system parameters, the network installer often falls short. This route solves the problem of installation diversity by completing the full system installation and customization inside a local virtual machine, then converting the virtual disk to raw img format and injecting iSCSI boot dependencies.
- Route 3: Building a Clean Skeleton with debootstrap Targeting server scenarios that demand extreme cleanliness, minimal footprint, and automated deployment, this route bypasses all graphical or interactive installers, directly pulling base system packages from the mirror via
debootstrap, and performing precise injection of low-level dependencies inside achrootenvironment.
Generalizable Significance of the Methodology
The core methodology presented in this chapter—“bypass official installer limitations, directly build or convert system images, deeply customize initramfs hooks via chroot”—not only solves the Debian problem but also serves as a universal paradigm for conquering diskless boot on most Linux distributions that rely on initramfs-based boot mechanisms (e.g., Ubuntu, Arch Linux, RHEL family).
3.2 Route 1: Based on the Official netboot Installer
The tftp/menu.ipxe file in the iPXE-All-Ready repository already includes the scheduling logic for the Debian 12 installation. You do not need to modify this script manually; just understand its configuration content and prepare the corresponding HTTP resource files as required.
The following is the core code snippet for the Debian installation entry in menu.ipxe:
:debian-install
echo Starting Debian 12 installer for ${initiator-iqn}
set root-path iscsi:${iscsi-server}${iscsi-sep}${base-iqn}:${hostname}.Debian
cpuid --ext 29 && set arch amd64 || set arch x86
set base-url http://${controller_ip}:88/Install/Debian/12
kernel ${base-url}/netboot/vmlinuz \
    auto=true \
    priority=critical \
    url=${base-url}/preseed.cfg \
    ipv6.disable=1 \
    netcfg/disable_autoconfig=true \
    mirror/country=manual \
    mirror/http/hostname=mirrors.tuna.tsinghua.edu.cn \
    mirror/http/directory=/debian \
    mirror/suite=bookworm \
    ---
initrd ${base-url}/netboot/initrd.gz
boot || goto failed
goto start
Configuration Analysis
- Variable passing and architecture detection The script leverages the variable chain established in Section 1.5 to dynamically assemble the current Worker’s dedicated iSCSI Target path (
${root-path}). Meanwhile, thecpuid --ext 29instruction detects whether the CPU supports 64-bit long mode, thereby dynamically setting the${arch}variable. - Network initialization and basic environment assistance The parameters
auto=true,priority=critical, andurl=.../preseed.cfgload a basic preseed configuration file at a very early stage of the installation. This file primarily assists in completing low-level environment preparation such as network interface initialization. Once the network is ready, the subsequent system installation process (language, partitioning, package selection, etc.) is completed interactively within the installer interface. - Network configuration control
netcfg/disable_autoconfig=trueandipv6.disable=1disable some of the installer’s default network auto-configuration behaviors and turn off IPv6, avoiding routing conflicts or initialization hangs in multi-NIC or complex iSCSI network environments.
To make the above script work correctly, you need to create the Install/Debian/12/ directory in the Controller node’s HTTP resource pool (corresponding to the repository’s www/ directory) and prepare the following files:
www/Install/Debian/12/
├── preseed.cfg           # Basic environment preseed file (already provided by the repo)
└── netboot/
    ├── vmlinuz           # Debian 12 official netboot kernel
    └── initrd.gz         # Debian 12 official netboot initial RAM disk
Obtaining netboot files: Download these two files from the official Debian mirror and place them in the netboot/ directory:
# Navigate to the www/Install/Debian/12/netboot directory under the repo root
wget http://deb.debian.org/debian/dists/bookworm/main/installer-amd64/current/images/netboot/debian-installer/amd64/linux -O vmlinuz
wget http://deb.debian.org/debian/dists/bookworm/main/installer-amd64/current/images/netboot/debian-installer/amd64/initrd.gz
Create a Debian-specific sparse file:
# Customize the disk image size as needed
fallocate -l 20G worker-01.debian.img
Once ready, run docker compose up -d to start the orchestrated three containers.
Run the automated script to register the Target:
./iscsi-target-gen.shOutput is as follows:
root@vm-ubuntu:/home/dutyc/ipxe-all-ready# ./iscsi-target-gen.sh
Found the following image files:
  worker-01.Debian.img
Using base IQN template: iqn.2026-07.com.controller:<filename/suffix>

Created Target: iqn.2026-07.com.controller:worker-01.Debian (TID=1, type: IMG)
  Created LUN 1 -> /home/iscsi_img/worker-01.Debian.img
  Bound access policy -> ALL

Displaying current Target configuration:
Target 1: iqn.2026-07.com.controller:worker-01.Debian
    System information:
        Driver: iscsi
        State: ready
    I_T nexus information:
    LUN information:
        LUN: 0
            Type: controller
            SCSI ID: IET     00010000
            SCSI SN: beaf10
            Size: 0 MB, Block size: 1
            Online: Yes
            Removable media: No
            Prevent removal: No
            Readonly: No
            SWP: No
            Thin-provisioning: No
            Backing store type: null
            Backing store path: None
            Backing store flags:
        LUN: 1
            Type: disk
            SCSI ID: IET     00010001
            SCSI SN: beaf11
            Size: 21475 MB, Block size: 512
            Online: Yes
            Removable media: No
            Prevent removal: No
            Readonly: No
            SWP: No
            Thin-provisioning: No
            Backing store type: rdwr
            Backing store path: /home/iscsi_img/worker-01.Debian.img
            Backing store flags:
    Account information:
    ACL information:
        ALL
root@vm-ubuntu:/home/dutyc/ipxe-all-ready#
Use curl and wireshark to test the HTTP endpoints and ensure normal access.
Create the Worker virtual machine: Create a VM with 2 vCPUs and 4 GB RAM, preferably using UEFI boot mode (BIOS mode also works but will have slight interface differences), and place it on the same NAT subnet as the Controller (192.168.80.0/24). The basic LAN parameters at this point are: Controller IP 192.168.80.3, LAN gateway 192.168.80.2.
Installation Process and iSCSI Configuration
Boot the diskless VM. On the first boot, you will see an IQN assembled with the MAC address; note down the MAC address (this VM’s MAC is 00:0c:29:b9:8b:2d).
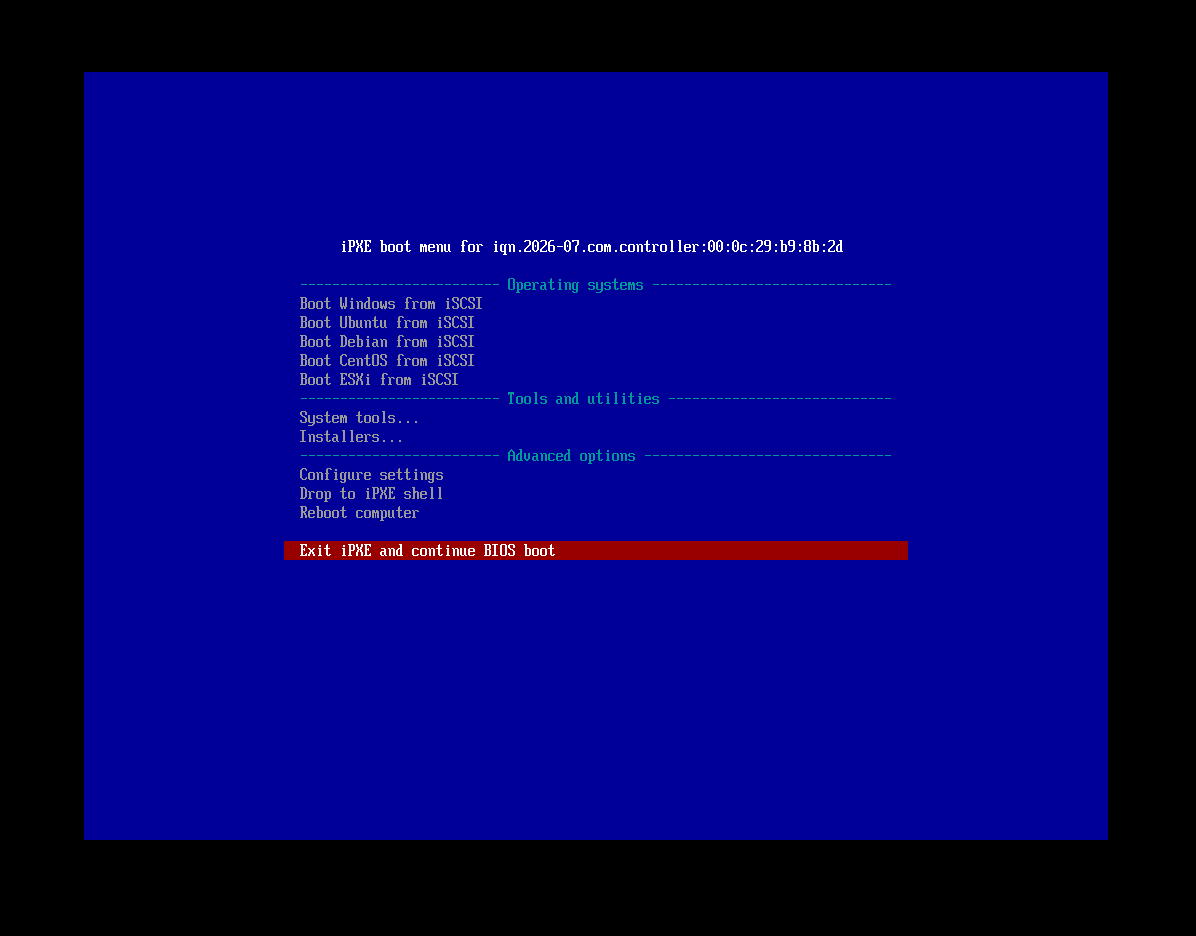
Edit the dnsmasq/dhcp-hosts.conf file in the project repository and add the following hostname assignment:
00:0c:29:b9:8b:2d,worker-01Then reload the dnsmasq container’s configuration:
docker exec ipxe-dnsmasq killall -HUP dnsmasqBoot the diskless VM again. You will now see the base IQN assembled with the hostname.
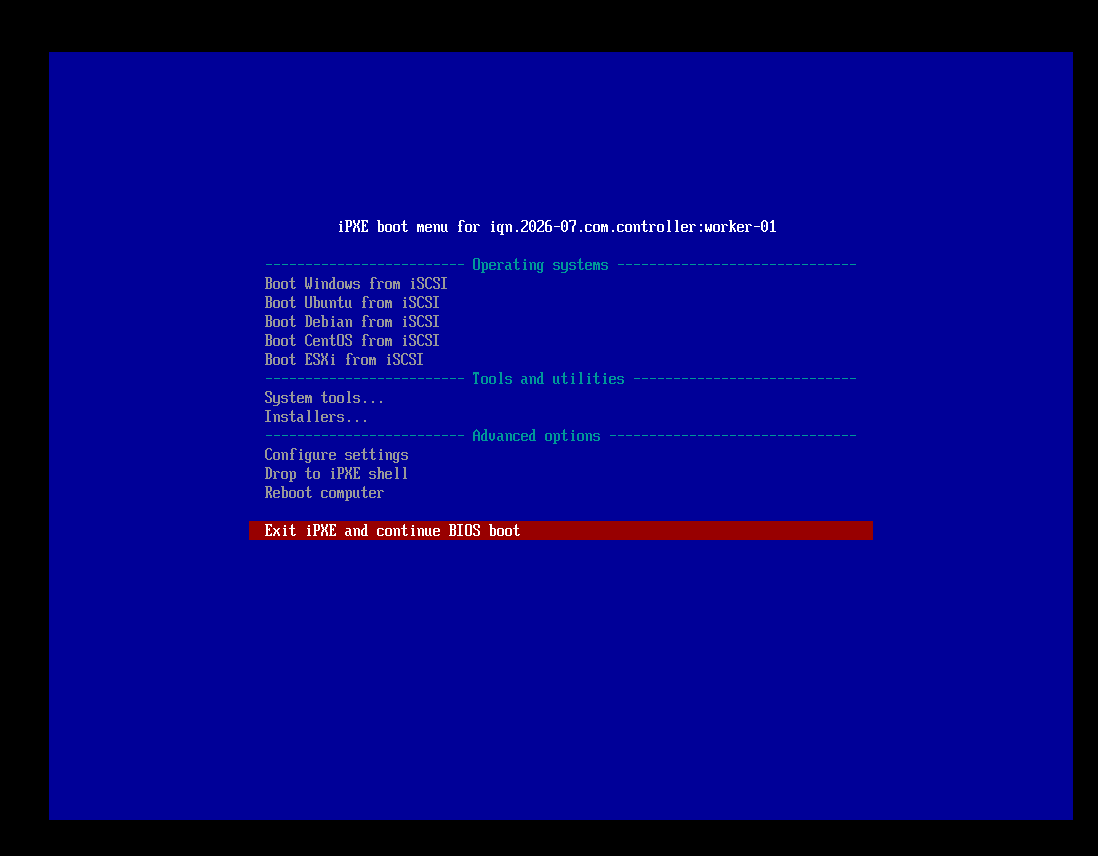
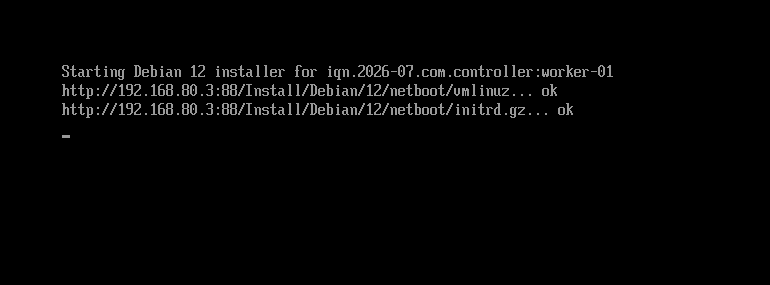
Select the Installers option, then choose Hook Debian ${arch} iSCSI and install. The required files will be downloaded and netboot will start.
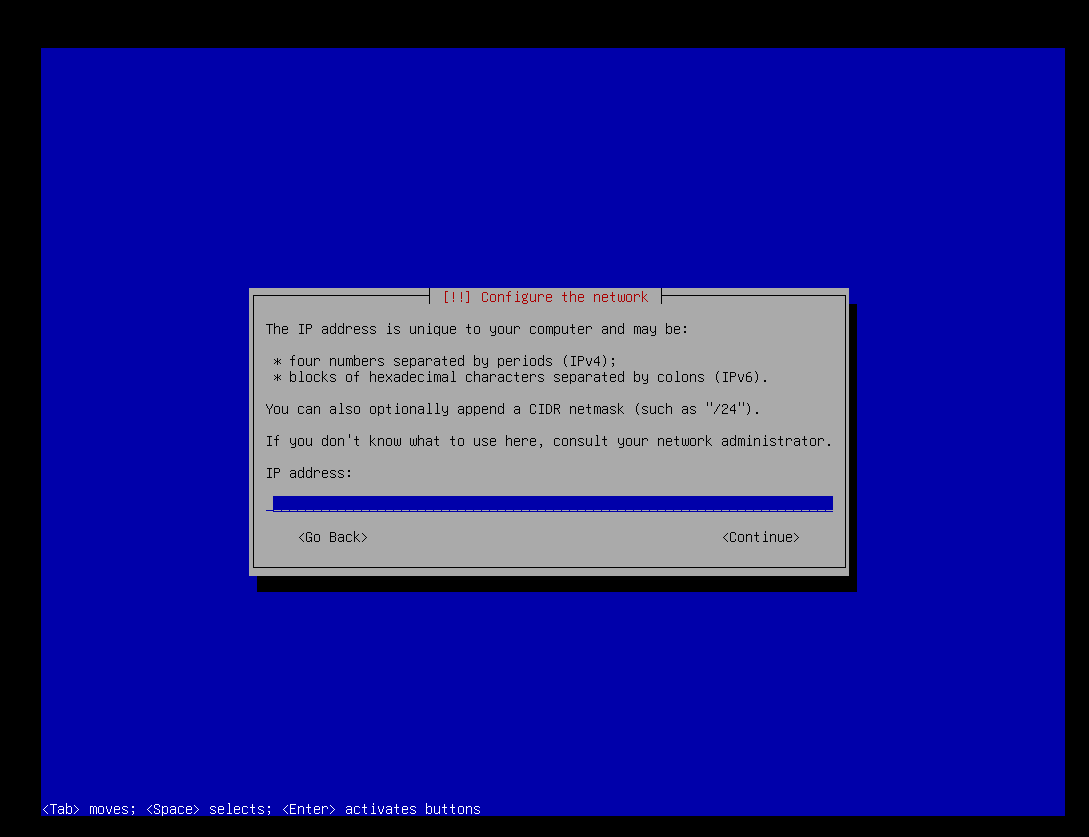
The installer will then prompt you to configure an IP address for this Worker. This configures the network environment for the running installer; it will not be inherited by the Debian system boot stage. Therefore, just assign an unused IP, e.g., 192.168.80.40/24.
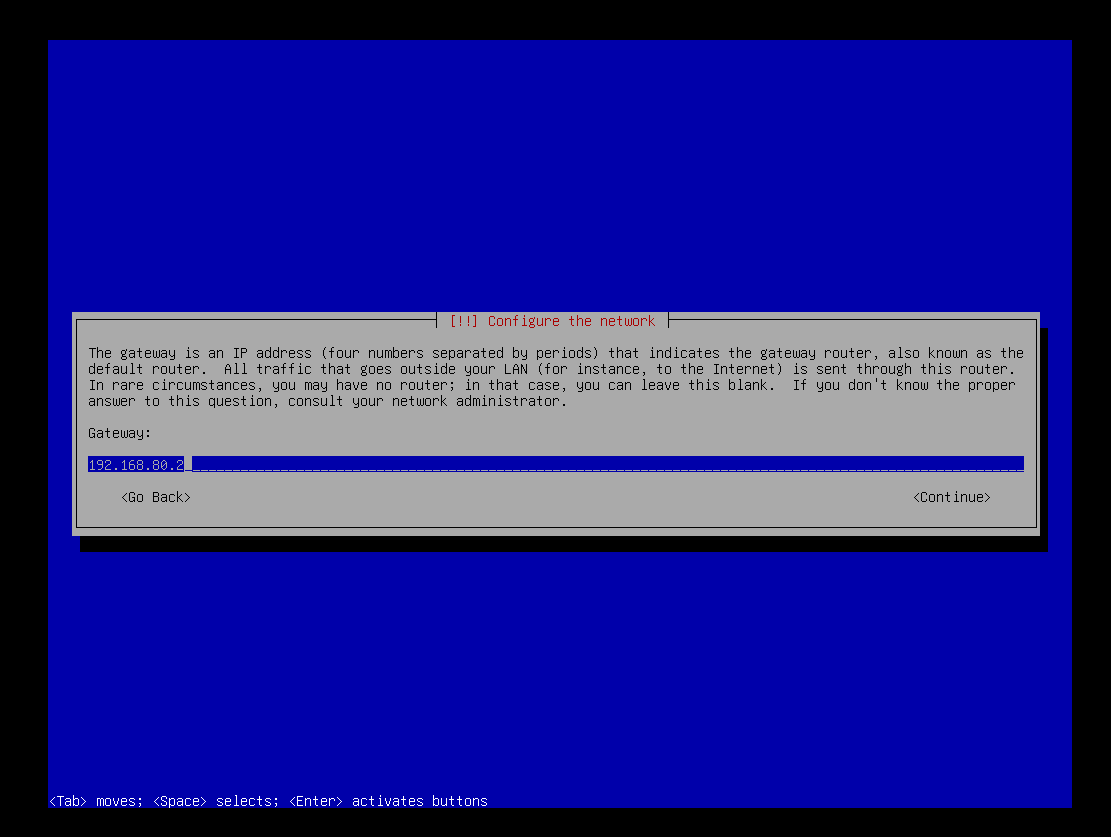
Configure the gateway by entering the LAN gateway address 192.168.80.2.
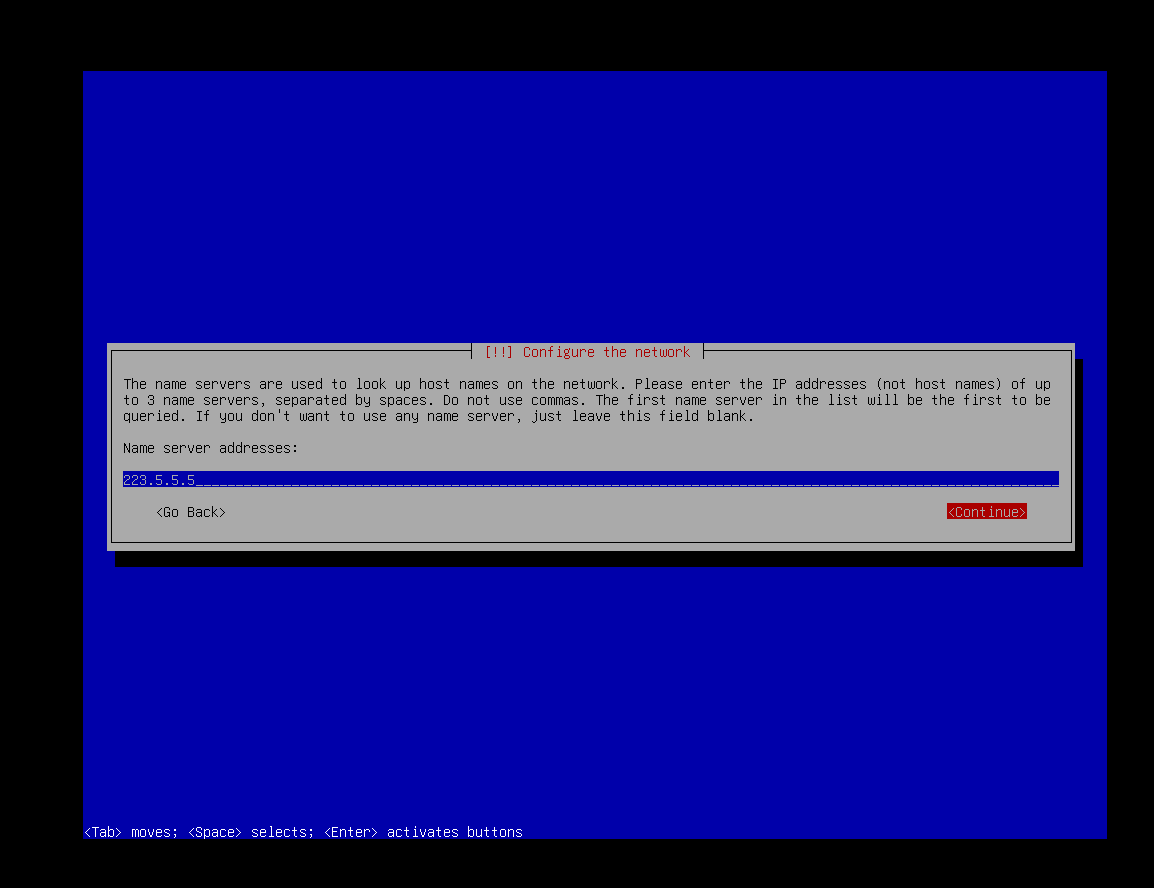
Configure the DNS server by entering 223.5.5.5.
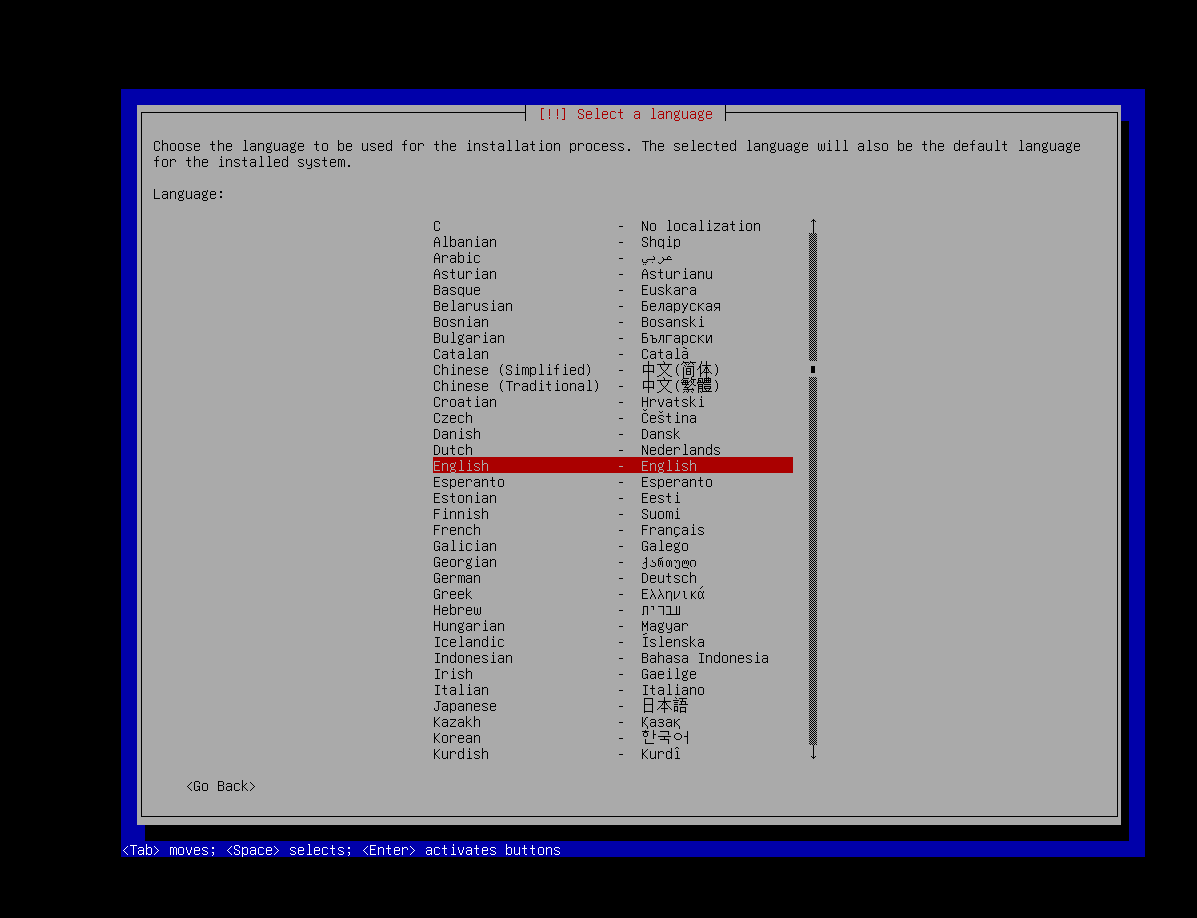
Select the language.
You will then enter the mirror configuration stage. Enter a mirror address appropriate for your actual network environment; otherwise, the download speed will be very slow. This netboot installer installs the GNOME desktop environment by default (for large-scale deployments, it is recommended to set up a local deb package caching mirror to improve efficiency). Here we configure the Alibaba Cloud mirror.
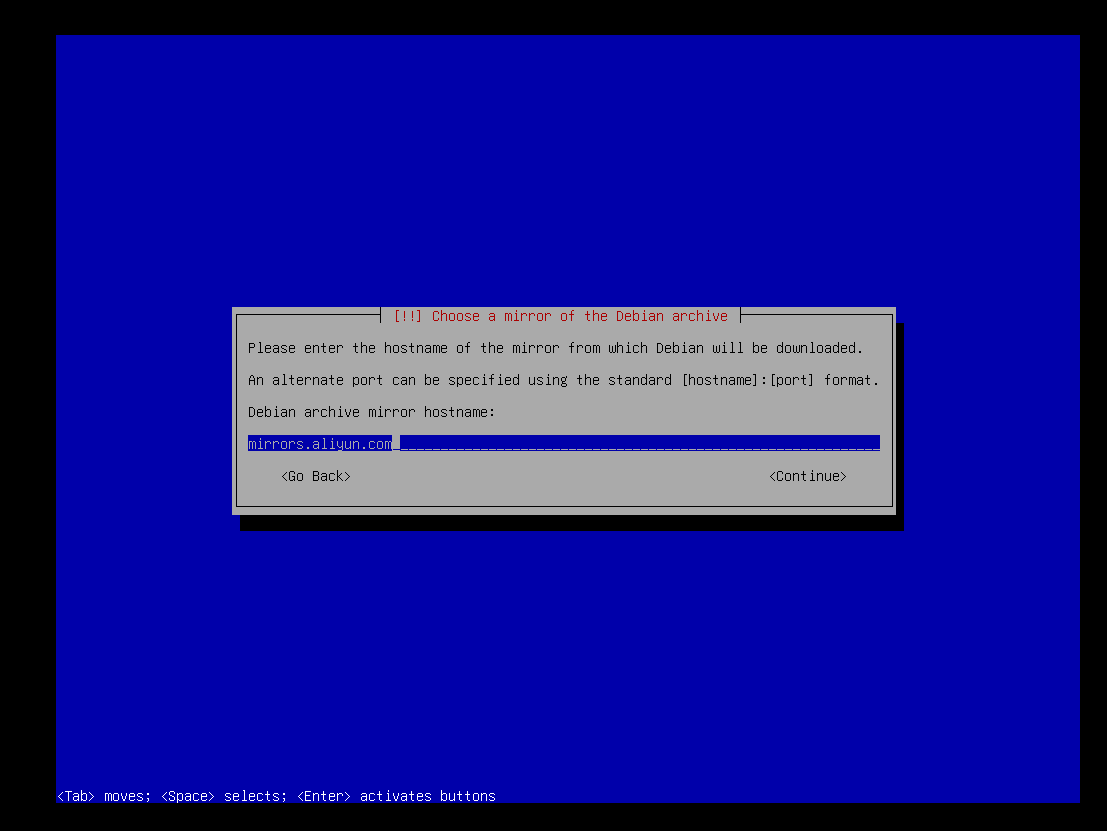
The installer will check mirror availability. If this step passes smoothly, the network configuration is correct; if a connection error is reported and the mirror URL is correctly spelled, you need to check for issues in the IP address, gateway, or DNS configuration.
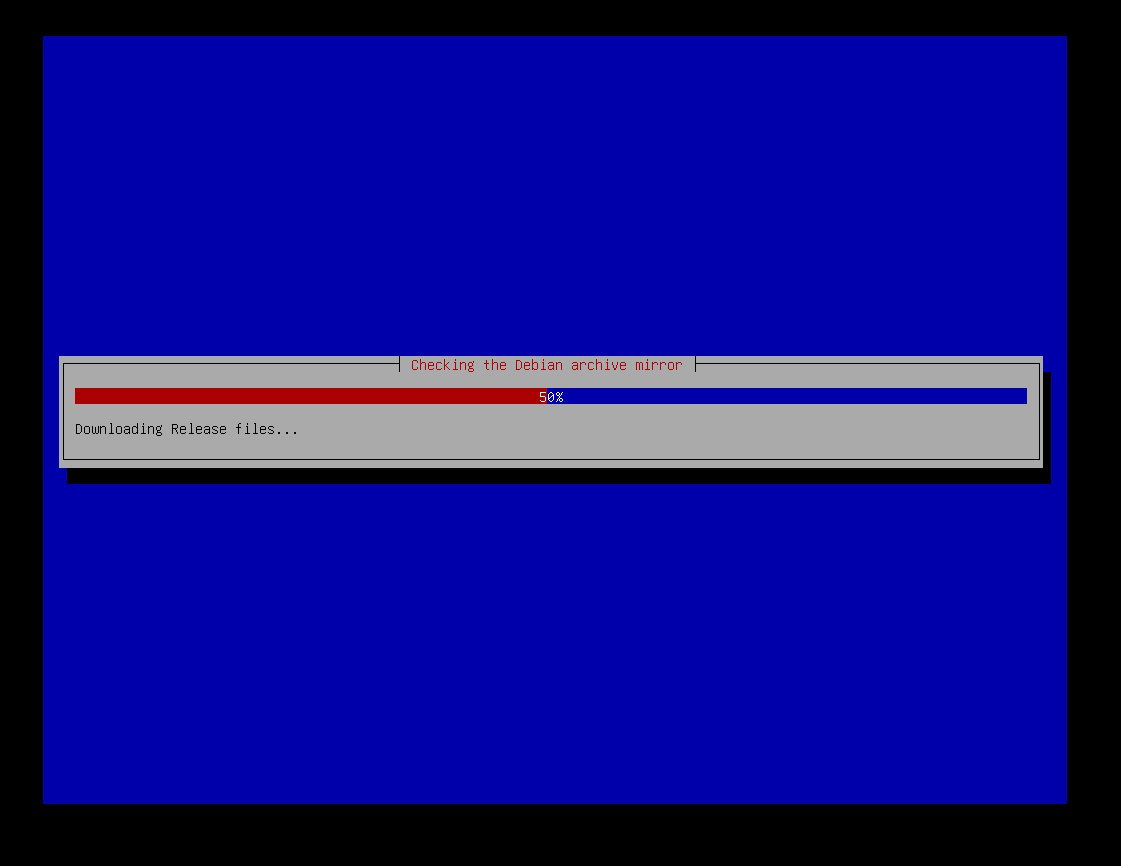
Then proceed through root password and regular user setup as per the standard routine.
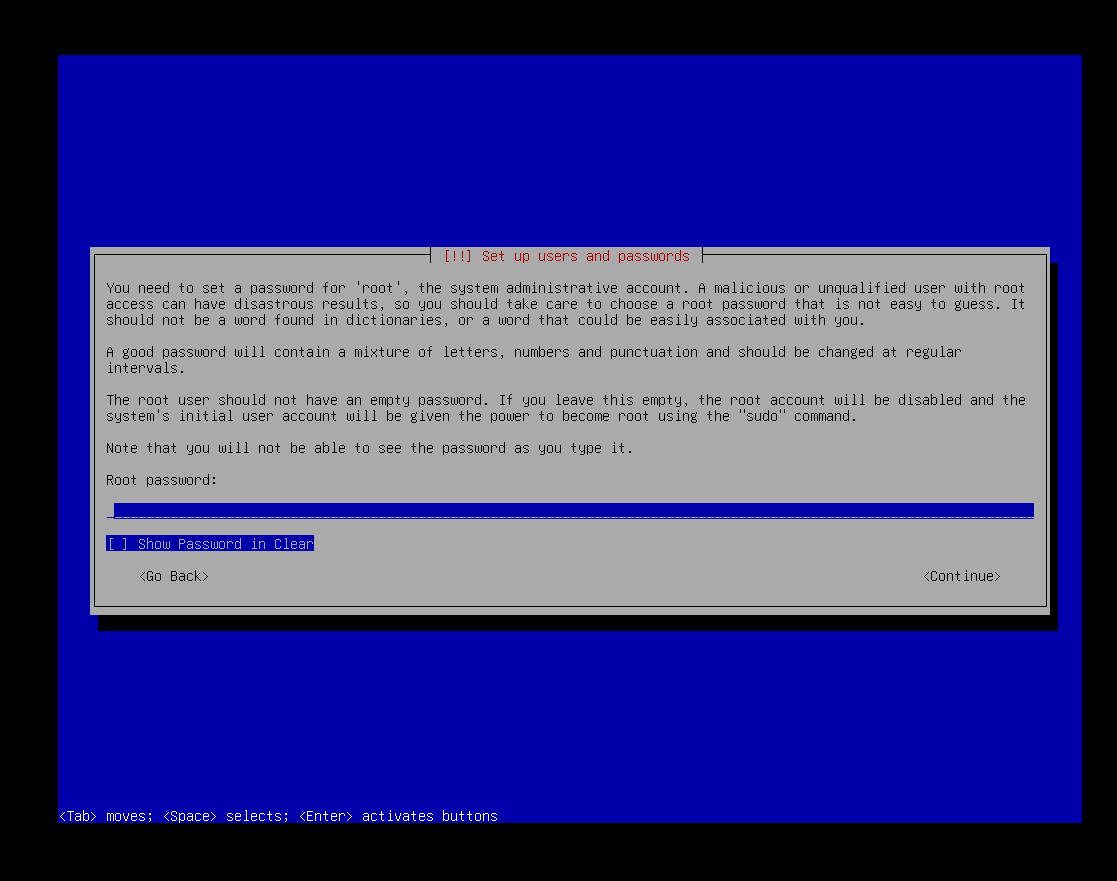
After completing account setup, the installer will prompt to configure iSCSI-related parameters. Choose Configure iSCSI volumes.
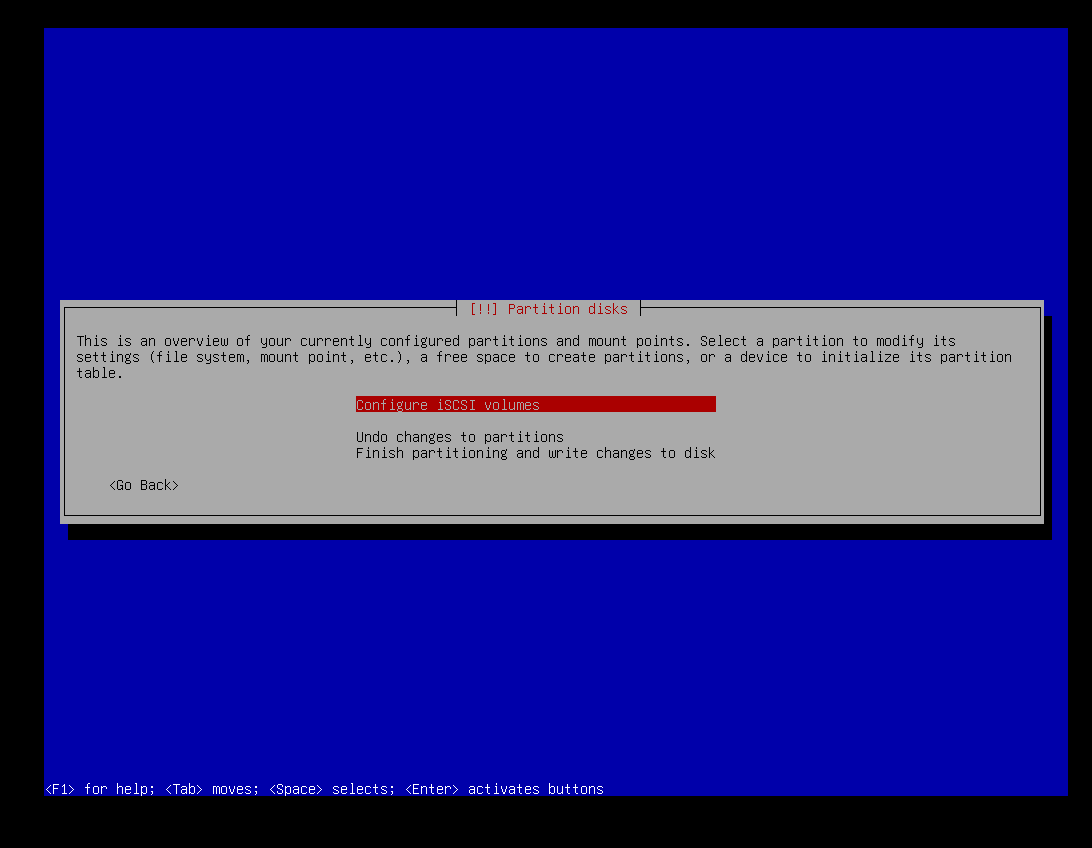
The following prompt appears:
[! !] Partition disks
This menu allows you to configure iSCSI volumes.
iSCSI configuration actions

>Log into iSCSI targets
>Finish
Select Log into iSCSI targets.
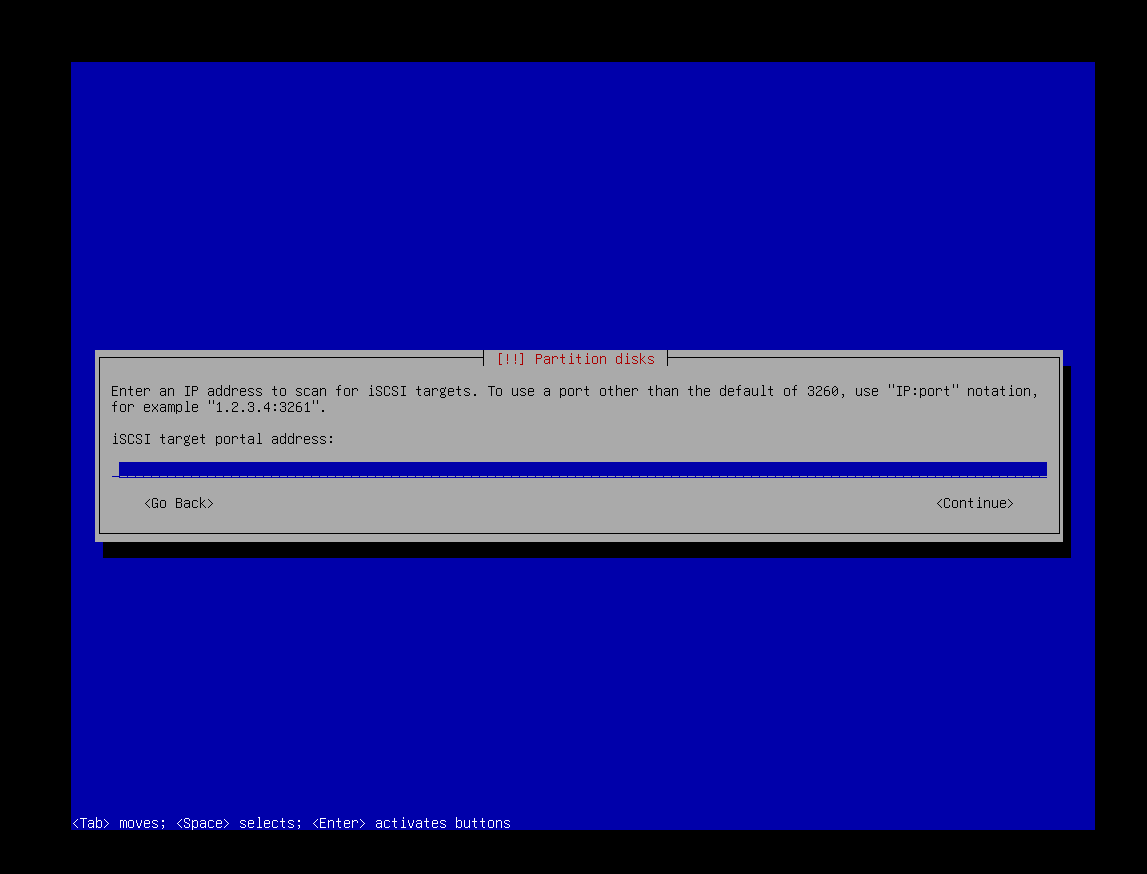
At the iSCSI target portal address: prompt, enter the iSCSI Server IP (in this deployment, the Controller and iSCSI Server are on the same machine, so enter 192.168.80.3).
The system will then ask for an authentication username and password. Since no CHAP authentication is configured on the Target side, entering any characters here will satisfy the installer’s form validation logic and allow the connection to complete.
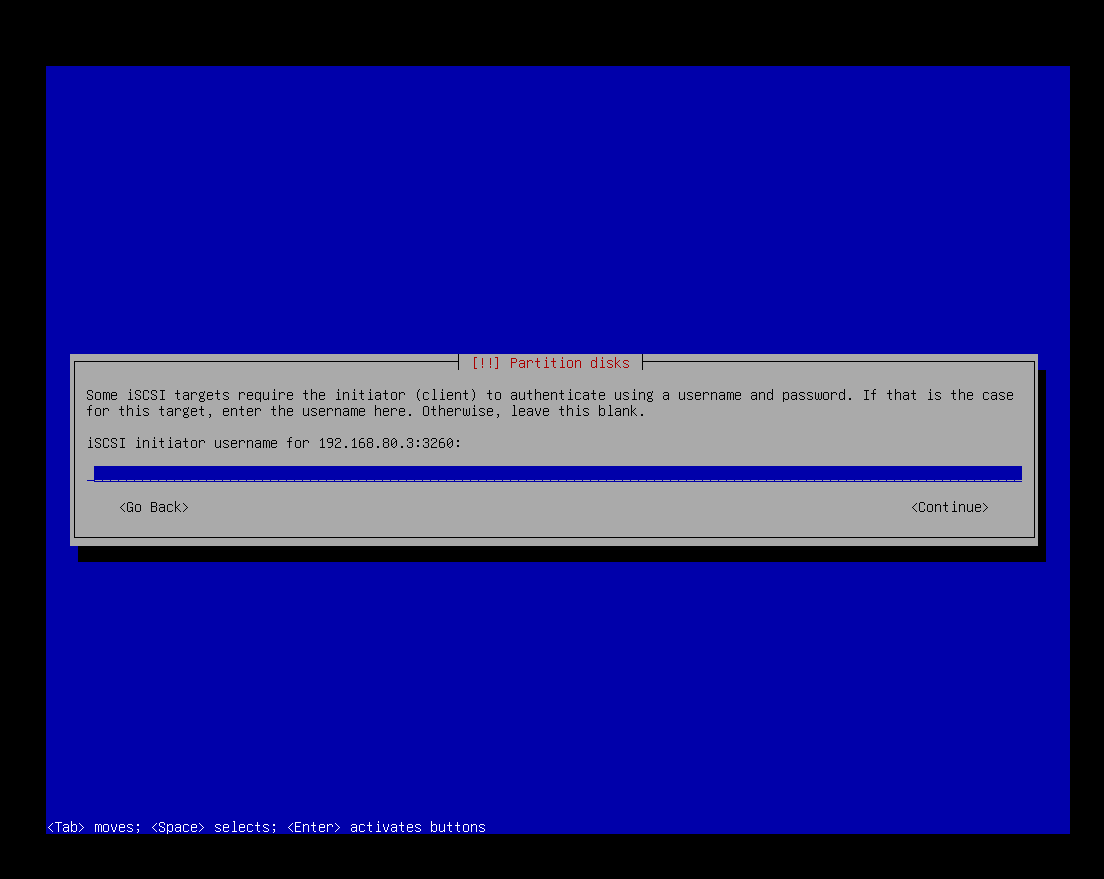
In some cases, the installer may ask you to re-enter the credentials to confirm the connection; follow the specific prompts.
After a successful connection, the interface will list the available iSCSI Targets. Press the spacebar to check the target, press Tab to move to <Continue>, and press Enter.
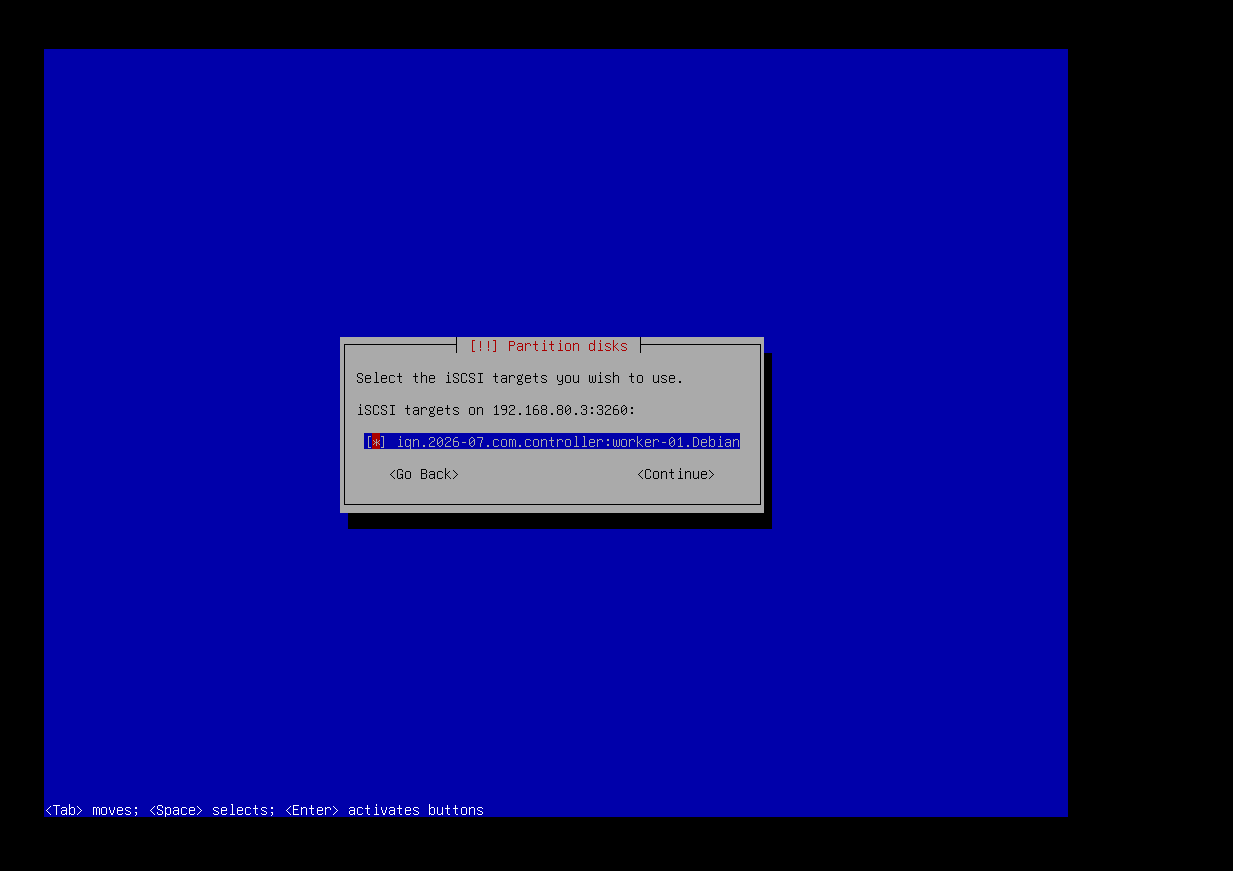
At this point, the interface might indicate an iSCSI connection loss:
[! !] Partition disks

iSCSI login failed
Logging into the iSCSI target iqn.2026-07.com.controller:worker-01.Debian on 192.168.80.3:3260 failed.

Check /var/log/syslog or see virtual console 4 for the details.

<Continue>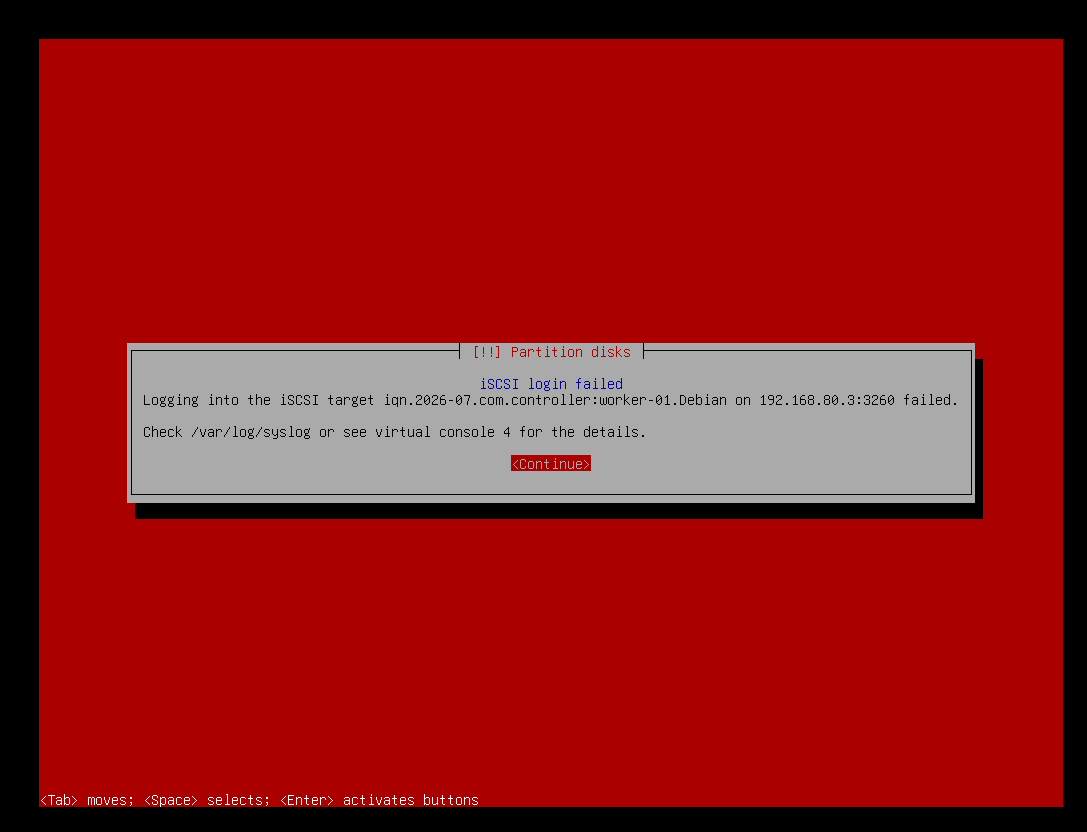
For this error, you need to perform a chain investigation. First, check the docker compose status on the Controller node:
root@vm-ubuntu:/home/dutyc/ipxe-all-ready# docker compose ps
NAME           IMAGE                                                                                      COMMAND                  SERVICE        CREATED             STATUS             PORTS
ipxe-dnsmasq   jpillora/dnsmasq@sha256:98b69ad825942089fb7c4b9153e3c5af0205eda3a103c691e30b1a13fd912830   "/usr/sbin/dnsmasq --…"   ipxe-dnsmasq   About an hour ago   Up About an hour
ipxe-iscsi     wtnb75/stgt@sha256:1b609555f26bb7a2b2a49a093eff8473e196a8cff49acc684345020eb79f813e        "tgtd -f"                ipxe-iscsi     About an hour ago   Up About an hour
ipxe-nginx     nginx@sha256:54f2a904c251d5a34adf545a72d32515a15e08418dae0266e23be2e18c66fefa              "/docker-entrypoint.…"   ipxe-nginx     About an hour ago   Up About an hour   0.0.0.0:88->80/tcp, [::]:88->80/tcp
root@vm-ubuntu:/home/dutyc/ipxe-all-ready#
Confirm that the iSCSI container status is normal, and that the historical output shows the LUN was created successfully.
To verify the availability of the iSCSI service itself, you can install the open-iscsi tool directly on the Controller’s Ubuntu environment and attempt a connection (in a production environment, it is recommended to use a separate Linux node for verification). If the external node can mount it normally, the iSCSI server configuration is correct and the problem is confined to the installer environment.
Install open-iscsi:
sudo apt update
sudo apt install open-iscsi -y

# Start and enable at boot
sudo systemctl enable --now iscsid.service
sudo systemctl status iscsid.service
Discover and connect to the iSCSI Server’s Target:
# Replace <TARGET_IP> with the actual address
sudo iscsiadm -m discovery -t sendtargets -p <TARGET_IP>:3260
The output:
root@vm-ubuntu:/home/dutyc/ipxe-all-ready# sudo iscsiadm -m discovery -t sendtargets -p 192.168.80.3:3260
192.168.80.3:3260,1 iqn.2026-07.com.controller:worker-01.Debian
root@vm-ubuntu:/home/dutyc/ipxe-all-ready#
Log into all discovered Targets:
sudo iscsiadm -m node -lOr log into a specific Target:
sudo iscsiadm -m node -T iqn.2026-07.com.controller:worker-01.Debian -p 192.168.80.3:3260 -lSuccessful login produces:
root@vm-ubuntu:/home/dutyc/ipxe-all-ready# sudo iscsiadm -m node -T iqn.2026-07.com.controller:worker-01.Debian -p 192.168.80.3:3260 -l
Logging in to [iface: default, target: iqn.2026-07.com.controller:worker-01.Debian, portal: 192.168.80.3,3260]
Login to [iface: default, target: iqn.2026-07.com.controller:worker-01.Debian, portal: 192.168.80.3,3260] successful.
root@vm-ubuntu:/home/dutyc/ipxe-all-ready#
After successful login, the iSCSI LUN will be presented as a local SCSI block device:
# Check for new block devices
lsblk
The output should show a new disk matching the configured image size (e.g., /dev/sdc 20G).
Since the external node can discover and log in successfully, the error shown on the installer screen is a “false alarm” caused by a state refresh.
Testing shows that pressing Shift + F4 on the red warning screen will take you back to the previous iSCSI configuration menu:
[! !] Partition disks

This menu allows you to configure iSCSI volumes.

iSCSI configuration actions

Log into iSCSI targets
Finish <---Select this

<Go Back>
Select Finish and press Enter.
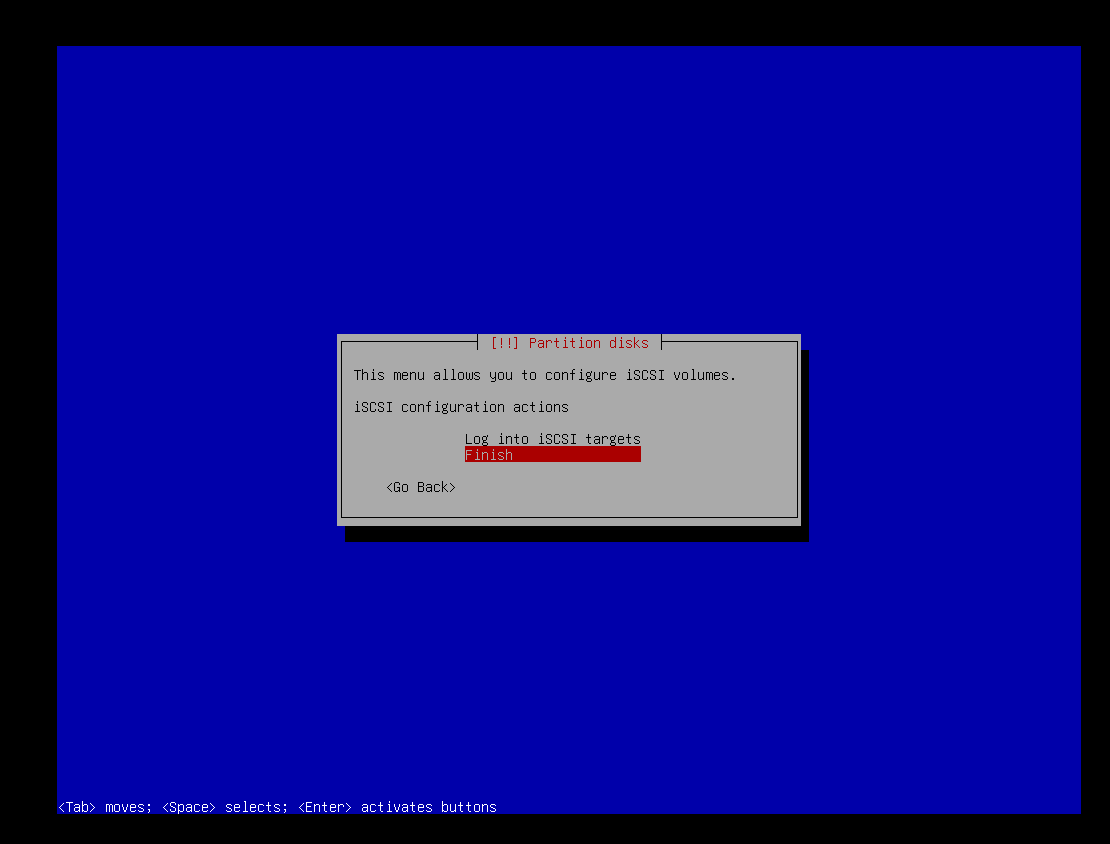
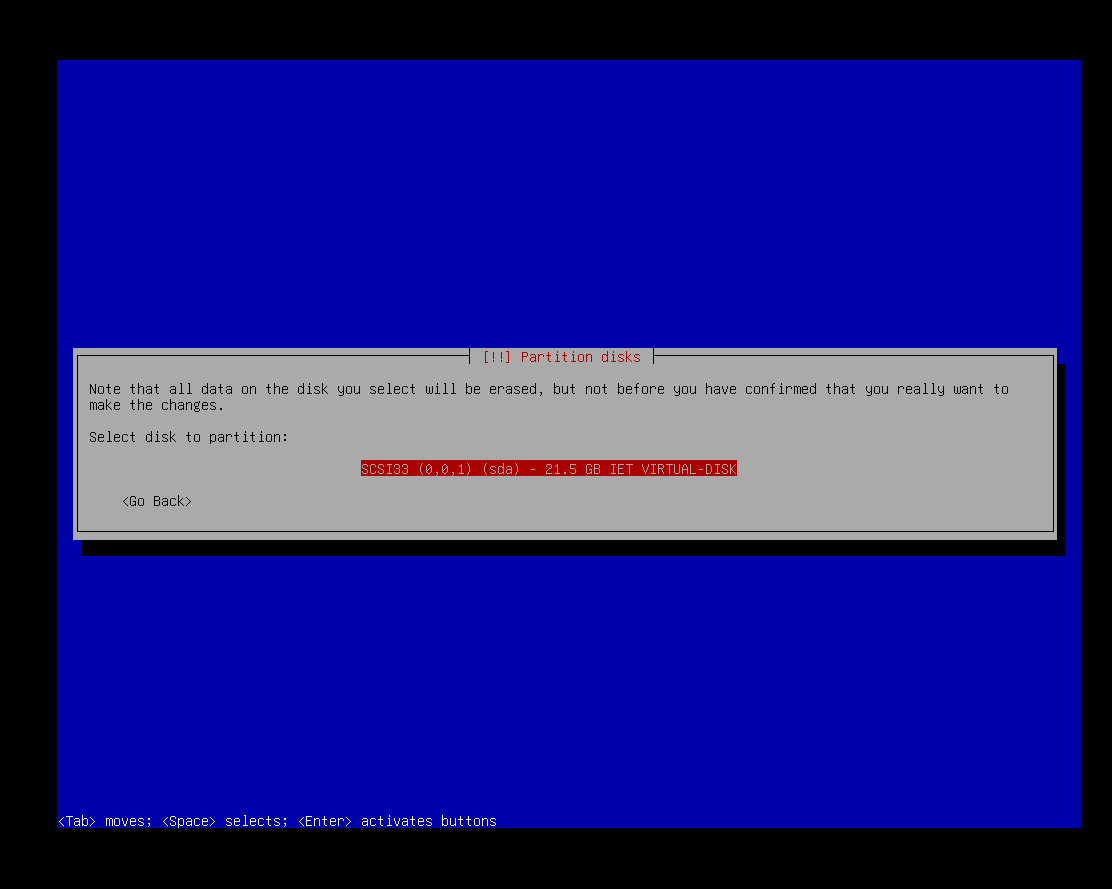
The interface will then proceed normally to the disk partitioning stage. You can complete partitioning normally here, further confirming that the iSCSI disk is actually connected.
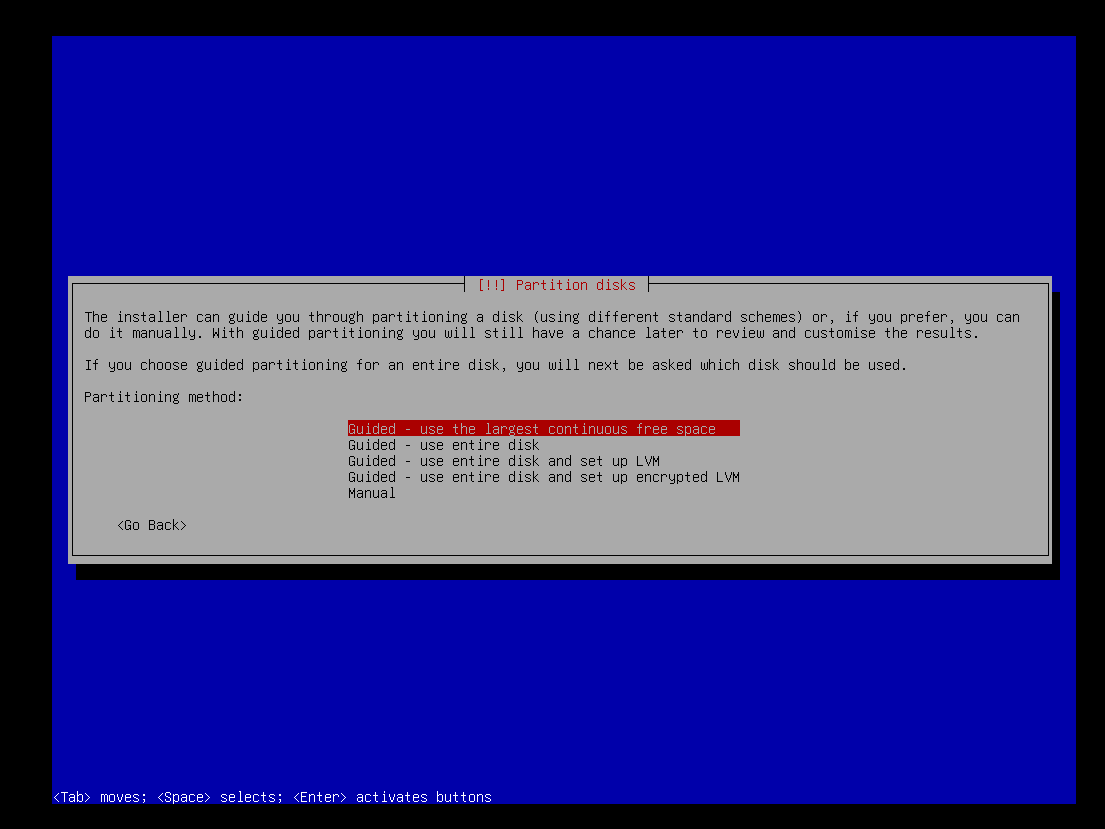
In the device list, you can clearly observe a 21 GB disk, confirming that the iSCSI storage is ready.
After completing the partition process, the system begins installing base components. During the Base system installation phase, occasional installation failures prompting a retry may occur. Retrying usually allows it to continue. If it gets stuck repeatedly, it is recommended to switch to Route 2 for deployment.
If you are using BIOS boot mode, when installing GRUB, you will see the following prompt:
Configuring grub-pc

You need to make the newly installed system bootable, by installing
the GRUB boot loader on a bootable device. The usual way to do this
is to install GRUB to your primary drive (UEFI partition/boot
record). You may instead install GRUB to a different drive (or
partition), or to removable media.

The device notation should be specified as a device in /dev. Below
are some examples:
- "/dev/sda" will install GRUB to your primary drive (UEFI
partition/boot
record);
"/dev/sdb" will install GRUB to a secondary drive (which may for
instance
be a thumbdrive);

<Go Back>

<Continue>
You need to enter /dev/sda and attempt to install the GRUB bootloader. This may fail at this stage; do not worry, as it can be remedied manually later in a chroot environment.
Finally, the installation will reach the reboot prompt screen.
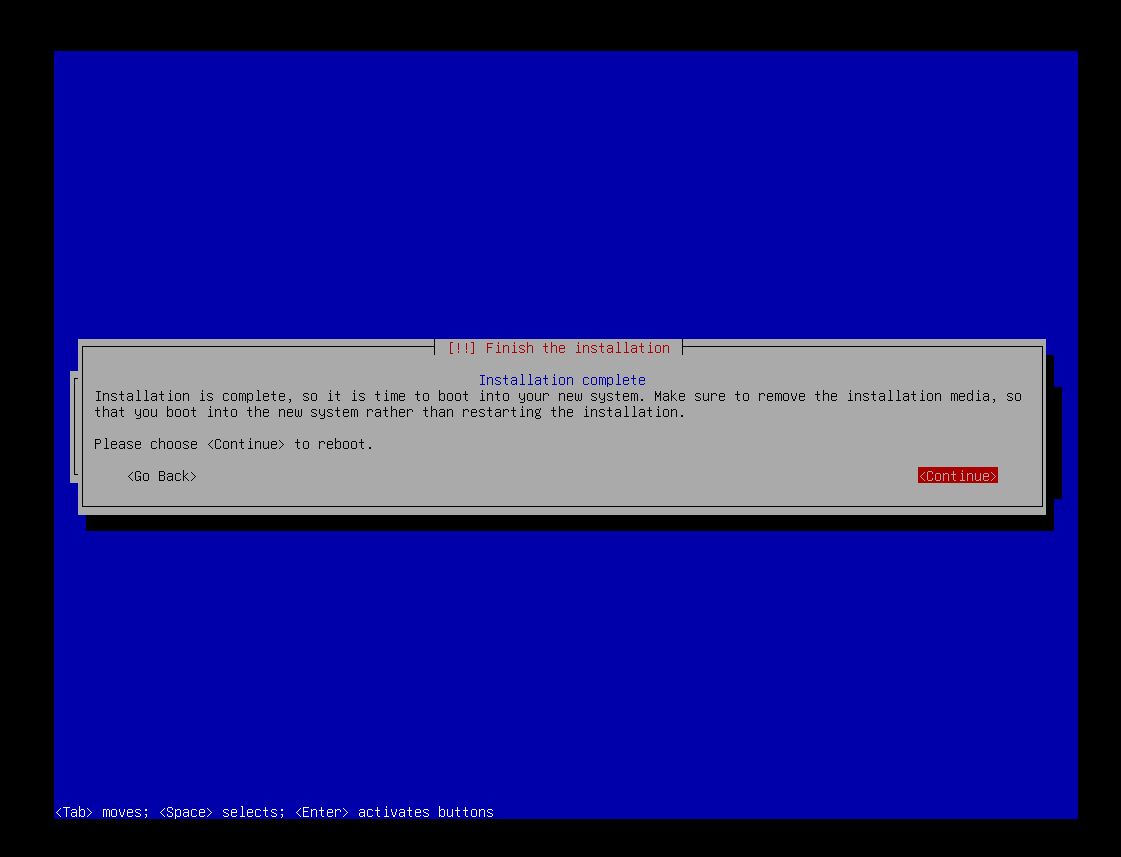
At this screen, due to the aforementioned configuration inheritance gap in the initramfs, you must intercept the reboot process and manually fix the system files. There are two ways to do this: one is to press Shift + F8 on this screen to bring up the [! !] Debian installer main menu, select Execute a shell to enter the underlying command-line environment, and modify the configuration via chroot.
Fixing the initramfs and GRUB Configuration
When the Debian installer finishes copying all files and prompts "Installation complete" ready to reboot, do not simply choose Continue.
Because of the configuration inheritance flaw of the official Debian installer (d-i) in an iSCSI environment, rebooting immediately at this point will inevitably lead to a VFS: Unable to mount root fs Kernel Panic. We need to intercept at the final step of the installation and manually fix the target system’s initramfs configuration.
- Choosing the repair environment: BusyBox or external mount?
At the "Installation complete" screen, you can press the key combination Shift + F8 to bring up the [! !] Debian installer main menu, select the Execute a shell option, and enter the underlying BusyBox command-line environment of d-i.
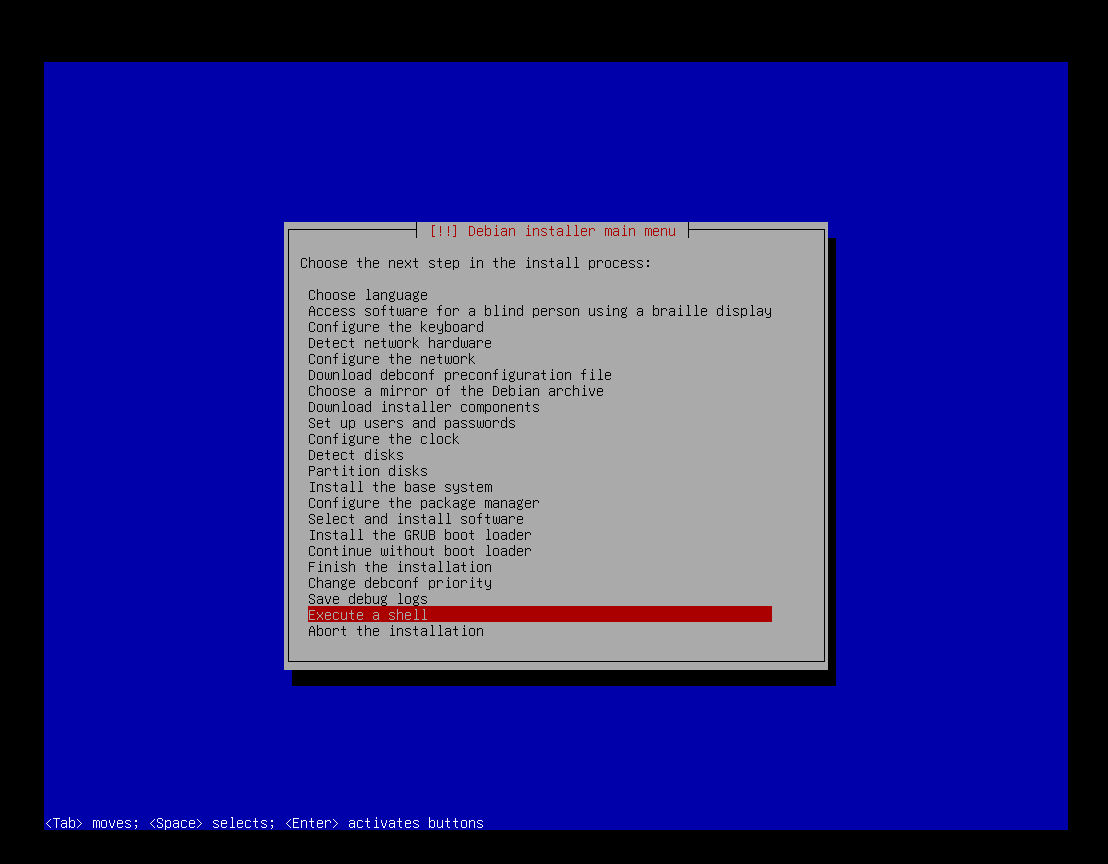
Once inside the shell, theoretically you can directly mount /target and chroot using the following commands:
# In the BusyBox environment, mount the target system’s filesystem
mount --bind /dev /target/dev
mount --bind /proc /target/proc
mount --bind /sys /target/sys

# Switch to the target system environment
chroot /target /bin/bash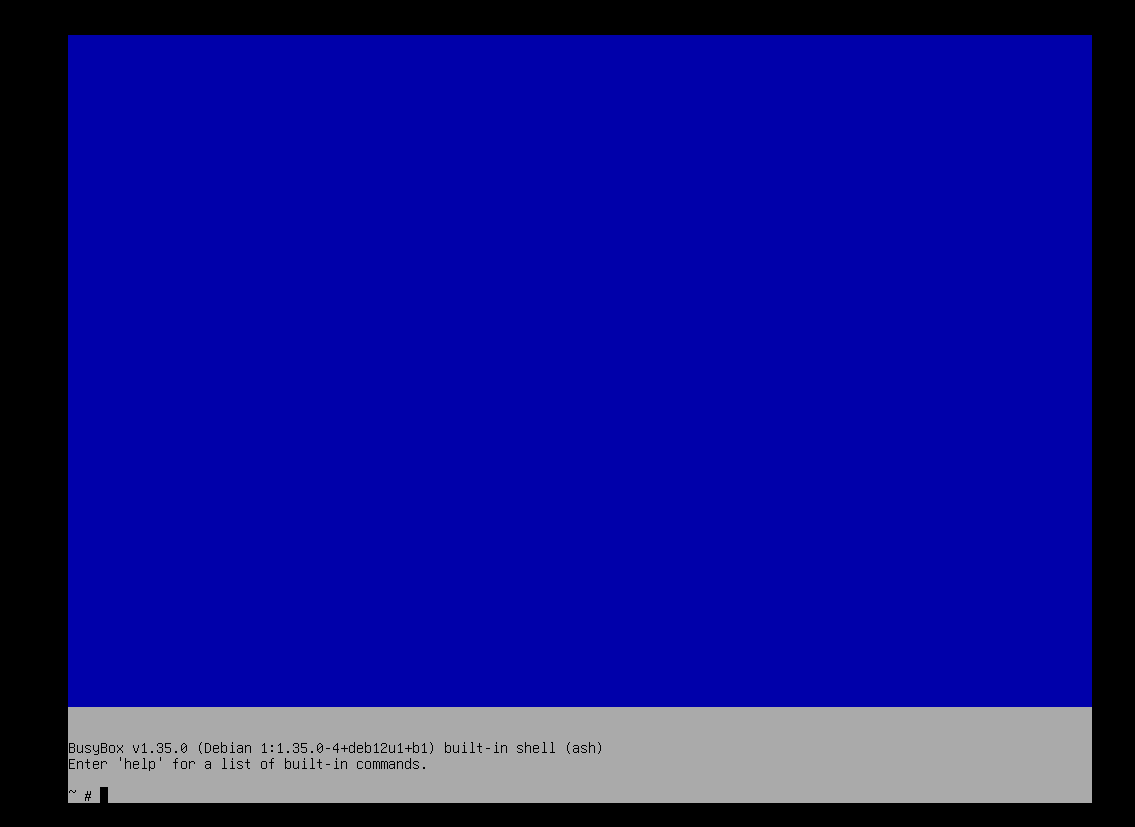
Engineering advice: Although the above method works, it is not recommended to perform complex chroot and file editing operations in the installer’s BusyBox command line. The BusyBox environment is extremely bare, lacks convenient copy-paste for long commands (such as writing hook scripts), and offers poor terminal support, making typos highly likely to cause repair failure.
A better approach is to abandon operations within BusyBox and instead leverage the decoupling between iSCSI block storage and the compute node. On another Linux device (such as the Controller host), directly mount that Worker’s iSCSI disk and then perform the chroot modification. This not only provides a full terminal environment but also makes it easier to record error logs.
- Release the iSCSI lock (critical prerequisite)
If you choose the “external mount” approach described above, you must first fully shut down the Worker virtual machine that is running the installer.
Reason: The iSCSI protocol relies on the SCSI command set at the low level. If the Worker VM (Initiator A) and the Controller host (Initiator B) simultaneously connect to and mount the same iSCSI Target (LUN), it will cause a serious SCSI lock conflict. Both systems will attempt to write filesystem metadata concurrently, leading to filesystem corruption in mild cases or a kernel panic in severe cases. A full shutdown ensures the Worker releases control of the LUN.
- Mount the LUN and Chroot on an External Linux Device
After confirming the Worker VM is shut down, perform the following on the Controller host (or another Linux device on the same subnet):
Discover and log into the Target:
# Discover the Target (replace <TARGET_IP> with the Controller’s real IP, e.g., 192.168.80.3)
sudo iscsiadm -m discovery -t sendtargets -p <TARGET_IP>:3260
# Expected output: 192.168.80.3:3260,1 iqn.2026-07.com.controller:worker-01.Debian

# Log into the specified IQN
sudo iscsiadm -m node -T iqn.2026-07.com.controller:worker-01.Debian -p <TARGET_IP>:3260 -l
Verify disk and partition structure:
Use lsblk to view the newly attached block device:
lsblkExample output:
sdc      8:32   0   20G  0 disk
├─sdc1   8:33   0  512M  0 part  # UEFI ESP partition
├─sdc2   8:34   0 18.5G  0 part  # Debian root partition (/)
└─sdc3   8:35   0  976M  0 part  # Swap partition
Note: In UEFI mode, the Debian installer automatically creates a 512M EFI system partition (sdc1). We need to mount the root partition (sdc2).
Mount the root partition and enter the chroot environment:
# Create mount directory
sudo mkdir -p /mnt/worker-01

# Mount the root partition (replace /dev/sdc2 with your actual lsblk output)
sudo mount /dev/sdc2 /mnt/worker-01

# Bind necessary virtual filesystems
sudo mount --bind /dev /mnt/worker-01/dev
sudo mount --bind /proc /mnt/worker-01/proc
sudo mount --bind /sys /mnt/worker-01/sys

# Switch to the target system environment
sudo chroot /mnt/worker-01 /bin/bash- Verifying the “Configuration Gap”: What Exactly Did the Official Installer Miss?
To confirm the community claim of “There is no way to do this with the standard Debian initrd” and to demonstrate the necessity of our “soul injection”, we can check whether the official installer actually inherited any iSCSI-related configuration into the local system.
Inside the chroot environment, view the initramfs module loading list:
cat /etc/initramfs-tools/modulesThe output is usually something like:
# List of modules that you want to include in your initramfs.
# They will be loaded at boot time in the order below.
#
# Syntax:  module_name [args ...]
#
# You must run update-initramfs(8) to effect this change.
#
# Examples:
#
# raid1
# sd_modConclusion: The list contains absolutely no iSCSI core modules such as iscsi_tcp or ib_iser. This directly proves that the Debian official installer, after laying down system files, did not package the iSCSI connection parameters and underlying drivers established during the installation phase into the local initrd.img.
When the system reboots and the kernel loads this incomplete initrd.img, it naturally cannot connect to the network storage at the very early stage, leading to a failure to mount the root filesystem.
Next, inside this chroot environment, we will manually fill in these missing pieces to perform the true “soul injection”.
- Performing the “Soul Injection”: Completing the initramfs and GRUB configuration
Once inside the chroot environment, we need to manually fill in the iSCSI boot dependencies that the Debian official installer missed. This is the core step to ensure the system can smoothly mount the network root filesystem after rebooting.
Step 1: Check and install open-iscsi
First, update the package sources and check if the open-iscsi package is already installed. If the installer didn’t include it when laying down the system, install it manually.
dpkg -l | grep open-iscsi
# If not installed, run:
# apt update
# apt install -y open-iscsi
Step 2: Inject iSCSI kernel modules
During the early boot of the initramfs, specific kernel modules need to be loaded to recognize iSCSI devices. Add iscsi_tcp and ib_iser to the module loading list:
# Add iSCSI modules to the initramfs loading list
echo "iscsi_tcp" >> /etc/initramfs-tools/modules
echo "ib_iser" >> /etc/initramfs-tools/modules

# Verify the addition
cat /etc/initramfs-tools/modules
Step 3: Configure iSCSI automatic login
Edit the iscsid.conf configuration file to ensure the iSCSI Initiator automatically tries to connect to the Target at system startup, rather than waiting for a manual trigger.
# Modify iscsid.conf to set automatic startup
sed -i 's/#node.startup = manual/node.startup = automatic/' /etc/iscsi/iscsid.conf
sed -i 's/node.startup = manual/node.startup = automatic/' /etc/iscsi/iscsid.conf

# Verify the modification
grep "node.startup" /etc/iscsi/iscsid.conf
# Expected output should contain: node.startup = automatic
Step 4: Modify GRUB kernel boot parameters
Inspect the GRUB configuration file /etc/default/grub; you’ll usually find GRUB_CMDLINE_LINUX_DEFAULT set to quiet and GRUB_CMDLINE_LINUX empty.
Edit the GRUB_CMDLINE_LINUX_DEFAULT variable to inject ip=dhcp so that the kernel can automatically obtain an IP address during the initramfs stage, and add ipv6.disable=1 to avoid network initialization delays. GRUB_CMDLINE_LINUX can remain empty.
# Use sed to replace the value of GRUB_CMDLINE_LINUX_DEFAULT
sed -i 's/GRUB_CMDLINE_LINUX_DEFAULT=".*"/GRUB_CMDLINE_LINUX_DEFAULT="text ip=dhcp ipv6.disable=1"/' /etc/default/grub

# Verify the change
grep "ip=dhcp" /etc/default/grub
# Expected output: GRUB_CMDLINE_LINUX_DEFAULT="text ip=dhcp ipv6.disable=1"
Note: The text parameter is added here to produce verbose console logs during boot, making it easier to observe the iSCSI connection status during the initramfs stage.
Step 5: Rebuild the initramfs and verify the packaging result
This is the most critical step. Run update-initramfs to forcibly regenerate the initrd.img containing the above modules and configurations.
To ensure the modules are packaged correctly, it’s recommended to redirect the output to a text file and then search for lines related to iscsi using grep.
# Rebuild initramfs for all kernel versions and save output to a log file
update-initramfs -u -k all > /tmp/initramfs_build.log 2>&1

# Search the log for records of iscsi module packaging
grep -i "iscsi" /tmp/initramfs_build.log
Expected verification result: In the output log, you should see entries like Adding module iscsi_tcp or Copying module iscsi_tcp. If the log contains no iscsi records at all, or reports module not found, it means the kernel module was not successfully injected. Go back to Step 2 to check the module name or reinstall the relevant kernel headers.
Unlike BIOS mode where you must manually rewrite the MBR, in UEFI mode the Debian installer typically has already placed the GRUB EFI file into the ESP partition. iPXE’s sanboot directly reads that ESP partition for chainloading, so it does not depend on the motherboard’s NVRAM boot entry. However, to rule out any packaging flaws caused by the iSCSI network environment, we still run grub-install with the --no-nvram parameter once inside the chroot as a defensive consolidation, ensuring no issues.
Check the GRUB bootloader installation status
UEFI boot mode:
Create a mount point and mount the ESP partition Based on our earlier lsblk output, /dev/sdc1 is the 512M EFI system partition. Inside the chroot, execute:
# Ensure directory exists
mkdir -p /boot/efi

# Mount the EFI system partition (confirm device name from your actual lsblk output, usually /dev/sdc1)
mount /dev/sdc1 /boot/efi
Verify mount status Confirm the partition is correctly recognized as a FAT32 filesystem:
df -h | grep /boot/efi
ls -l /boot/efi
Expected result: df -h should show /dev/sdc1 mounted on /boot/efi with type vfat. ls should show the EFI directory.
Re-execute UEFI GRUB installation Now that /boot/efi is ready, run the defensive install command with --no-nvram again:
grub-install --target=x86_64-efi --efi-directory=/boot/efi --bootloader-id=debian --recheck --no-nvramExpected result: The terminal should output Installation finished. No error reported.
BIOS boot mode: Be sure to run the following command to install GRUB to the iSCSI disk (assuming the iSCSI disk device is /dev/sdc) to guarantee robustness:
grub-install /dev/sdc
grub-install --recheck /dev/sdc
Update GRUB configuration (must be done for both UEFI and BIOS) Finally, ensure grub.cfg includes the kernel parameters we injected earlier, such as ip=dhcp:
update-grubVerify key files
# Check if initramfs contains iscsi modules
ls -lh /boot/initrd.img-*

# Check GRUB configuration
cat /boot/grub/grub.cfg | grep -A 5 "menuentry" | head -20
Then exit chroot:
exitClean up the environment and release the iSCSI lock
At this point, you must not power on the Worker VM immediately; be sure to disconnect the iSCSI connection first, otherwise a SCSI lock conflict will occur, causing filesystem corruption in mild cases or a kernel panic in severe cases.
Run the following commands to disconnect safely:
# Unmount directories
sudo umount /mnt/worker-01/dev /mnt/worker-01/proc /mnt/worker-01/sys
sudo umount /mnt/worker-01
# Log out the iSCSI Target
sudo iscsiadm -m node -T iqn.2026-07.com.controller:worker-01.Debian -p 192.168.80.3:3260 -u
Now boot the Worker VM and attempt an iSCSI boot.
Since this system was deployed via the official installer, the open-iscsi service has already recorded the Target’s connection information during the installation phase. Therefore, the system will automatically maintain the iSCSI session after booting, requiring no additional configuration.
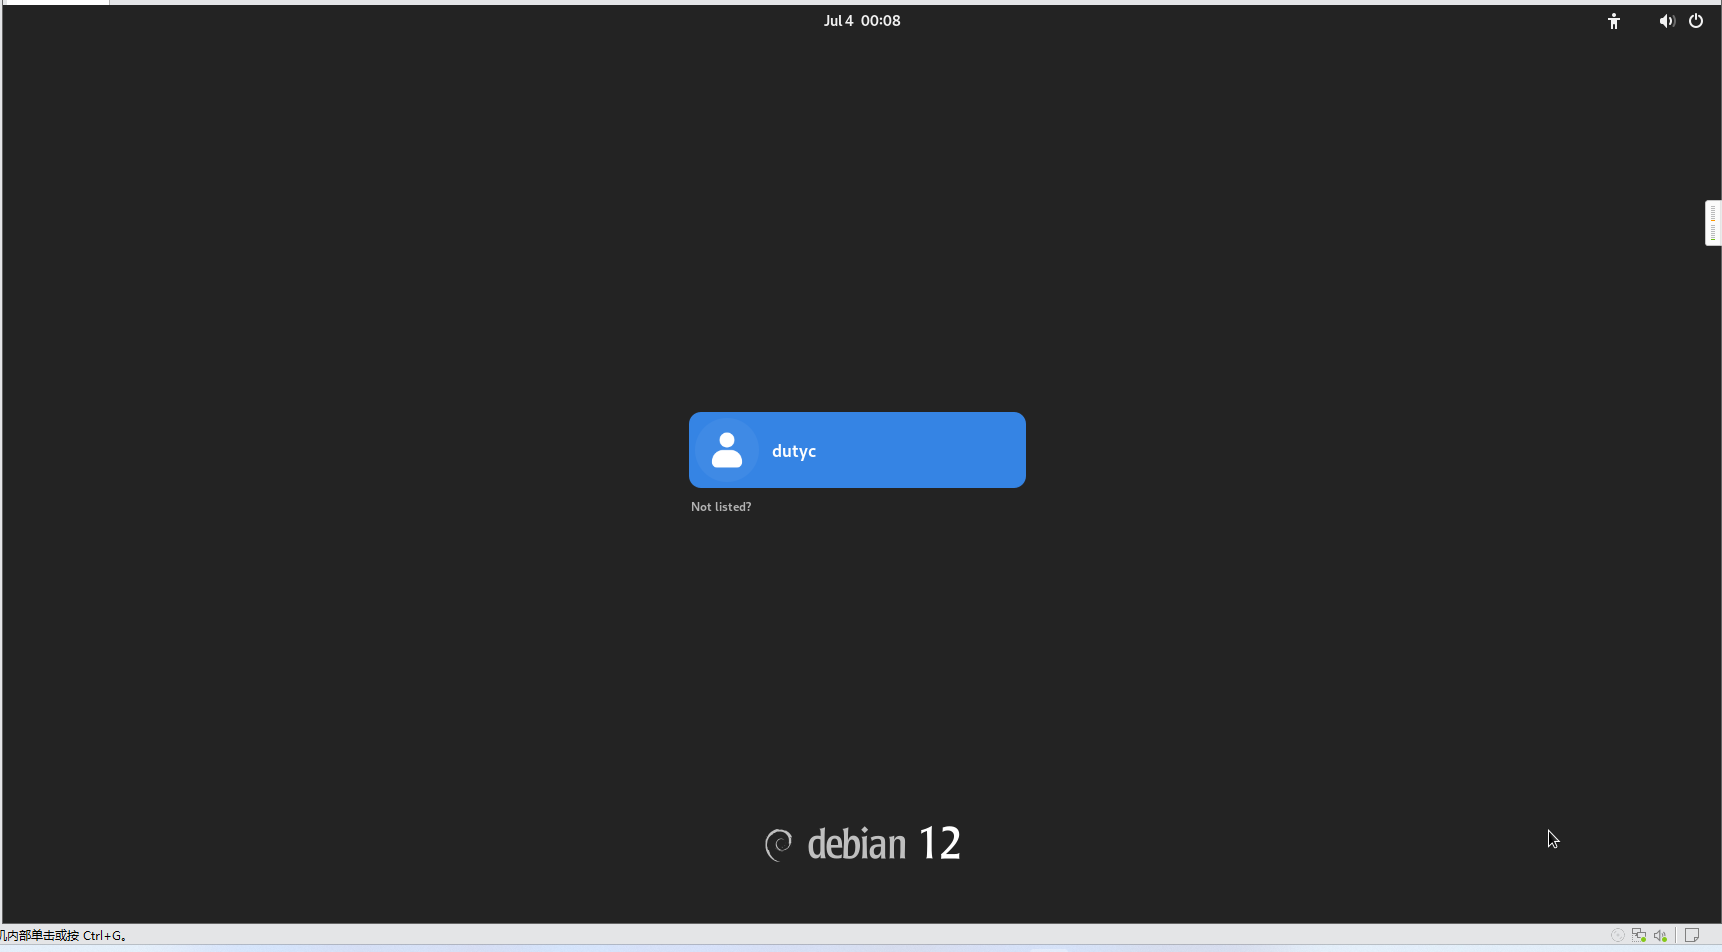
If everything goes well, you should see the GNOME desktop environment start up, completing the task of installing Debian via netboot.
3.3 Route 2: Virtual Machine Image Conversion and Customization
Engineering Positioning and Decision Tree
When the target system requires a complex desktop environment, proprietary closed-source drivers (e.g., NVIDIA graphics drivers), specific commercial software stacks, or when the official netboot installer repeatedly fails due to network instability and hardware compatibility issues, the standard process of Route 1 falls short.
Route 2 adopts a “dimensionality reduction” strategy: perform a conventional installation using a full Debian ISO image on a local virtualization platform, complete all the highly customized configurations, then convert the virtual disk to raw format and inject iSCSI boot dependencies via an external chroot. This approach completely bypasses the limitations of the network installer, decoupling “system construction” from “diskless adaptation”.
To adapt to different engineering environments, this route provides the following decision tree:
- Virtualization build platform: VMware Workstation / VirtualBox / Proxmox VE (PVE).
- Disk format conversion tool:
qemu-img(Linux command line) / StarWind V2V Converter (Windows GUI) /VBoxManage(bundled with VirtualBox). - Image mounting method: iSCSI network mount / local loop device mount.
Core Safety Principle: External Chroot Modification Theoretically, one could install open-iscsi and rebuild the initramfs directly inside the running virtual machine. However, in engineering practice, this is strongly discouraged. Modifying low-level boot dependencies while the system is running can easily cause the VM itself to lose its local boot capability, thereby destroying the original template. Performing modifications via external mount and chroot ensures the original VM image always remains in a “safe, rollback-ready” pristine state.
System Construction in a Local Virtual Machine Environment
Create a new Debian 12 virtual machine on your chosen virtualization platform.
- Hardware configuration: Allocate the appropriate CPU, memory based on the target Worker’s physical hardware specs, and add a local virtual disk (20 GB or more recommended).
- Firmware type: Strictly choose UEFI or BIOS (Legacy) according to the target physical machine’s boot mode.
- System installation and customization: Mount the Debian 12 full ISO image and proceed with a conventional installation. At this stage, you can freely configure the desktop environment (e.g., KDE, XFCE), install proprietary drivers, and set up business software and system parameters.
- Bootloader: Ensure GRUB is correctly installed to the boot sector (BIOS) or EFI System Partition (UEFI) of that virtual disk.
After installation and customization are complete, completely shut down the virtual machine.
Virtual Disk Format Conversion
iSCSI Targets and iPXE require a standard raw block device format, whereas virtualization platforms typically use specific disk formats (e.g., .vmdk, .vdi, or .qcow2). Choose the appropriate conversion tool based on your environment.
Option A: Using qemu-img (recommended, for Linux Controller) Install qemu-utils on the Controller node and perform the conversion:
sudo apt install qemu-utils -y
# Convert vmdk/qcow2 to raw img format
qemu-img convert -f vmdk -O raw debian-vm-disk.vmdk worker-02.Debian.img
Option B: Using StarWind V2V Converter (for Windows environments) If the VM files reside on a Windows host, download StarWind V2V Converter (GUI tool). Select the source .vmdk or .vdi file, choose Raw (or IMG) as the destination format, and export directly as worker-02.Debian.img.
Option C: Using VBoxManage (for VirtualBox users) If using VirtualBox, you can directly call its built-in tool to clone:
VBoxManage clonemedium disk debian-vm-disk.vdi worker-02.Debian.img --format RAWImage Mounting Method Selection
The converted .img file contains a full partition table and needs to be mapped as a block device for subsequent mounting.
Option A: Local Loop Device Mount (most convenient) Use Linux’s loop mechanism to directly map the local file:
# Associate with a loop device and auto-scan partitions (-P flag)
sudo losetup -fP worker-02.Debian.img
# Check the assigned loop device (e.g., /dev/loop0)
lsblk
Option B: iSCSI Network Mount (for cross-node operations) If the converted .img file is stored on a NAS or a separate storage node, you can expose it to the Controller node via iSCSI for mounting:
# On the storage node, expose the img file as a LUN (temporary Target)
# On the Controller node, discover and log in
sudo iscsiadm -m discovery -t sendtargets -p <STORAGE_IP>:3260
sudo iscsiadm -m node -T <temporary_IQN> -p <STORAGE_IP>:3260 -l
lsblk
iSCSI Dependency Injection in a Chroot Environment
After confirming the root partition device node (e.g., /dev/loop0p2), mount it and enter the chroot environment:
sudo mkdir -p /mnt/debian-vm
sudo mount /dev/loop0p2 /mnt/debian-vm  # Replace with actual root partition node

sudo mount --bind /dev /mnt/debian-vm/dev
sudo mount --bind /proc /mnt/debian-vm/proc
sudo mount --bind /sys /mnt/debian-vm/sys

sudo chroot /mnt/debian-vm /bin/bash
Since Route 2 was installed conventionally via a local ISO, the system has absolutely no iSCSI network boot configuration. We need to build these low-level dependencies from scratch within the chroot environment.
1. Install open-iscsi and configure automatic login
apt update
apt install -y open-iscsi

sed -i 's/#node.startup = manual/node.startup = automatic/' /etc/iscsi/iscsid.conf
sed -i 's/node.startup = manual/node.startup = automatic/' /etc/iscsi/iscsid.conf
2. Manually create /etc/iscsi.initramfs (identity injection) This is the most critical step of Route 2. Debian’s initramfs boot script (/scripts/local-top/iscsi) at a very early stage prioritizes reading hardcoded parameters from /etc/iscsi.initramfs. Since a local installation does not generate this file, it must be created manually, writing the Controller’s IP and the Worker’s dedicated Target IQN.
cat > /etc/iscsi.initramfs << 'EOF'
ISCSI_TARGET_NAME="iqn.2026-07.com.controller:worker-02.Debian"
ISCSI_TARGET_IP="192.168.80.3"
ISCSI_TARGET_PORT="3260"
ISCSI_TARGET_GROUP="1"
EOF
3. Modify the official Hook script (dimensionality reduction) Debian’s official update-initramfs tool has a logical blind spot: its Hook script does not automatically package the root’s /etc/iscsi.initramfs into the initrd. If you run the update directly, this file will be ignored. You must directly modify the official Hook script to forcibly inject the copy logic.
# Insert a cp command before the exit 0 in the official iscsi hook script
sed -i '/^exit 0/i cp /etc/iscsi.initramfs ${DESTDIR}/etc/iscsi.initramfs' \
  /usr/share/initramfs-tools/hooks/iscsi
4. Inject kernel modules and modify GRUB
echo "iscsi_tcp" >> /etc/initramfs-tools/modules
echo "ib_iser" >> /etc/initramfs-tools/modules

sed -i 's/GRUB_CMDLINE_LINUX_DEFAULT=".*"/GRUB_CMDLINE_LINUX_DEFAULT="text ip=dhcp ipv6.disable=1"/' /etc/default/grub
5. Handle the ESP partition for UEFI mode (UEFI only) If the VM uses UEFI mode, you must mount the ESP partition (e.g., /dev/loop0p1):
mkdir -p /boot/efi
mount /dev/loop0p1 /boot/efi
6. Rebuild the initramfs and update GRUB
update-initramfs -u -k all
update-grub
Defensive action: To ensure boot file integrity, run the GRUB installation again.
- UEFI mode:
grub-install --target=x86_64-efi --efi-directory=/boot/efi --bootloader-id=debian --recheck --no-nvram - BIOS mode:
grub-install /dev/loop0(note: use the loop device itself here, not a partition).
In-depth reading guide: Why doesn’t the official tool package this file? Why can’t you bypass the official tool and manually package the initrd with the
cpiocommand (which would cause a catastrophic Kernel Panic)? For a “forensic autopsy” of Debian initramfs multi-segment composite structure and the complete blood-and-tears troubleshooting history, please refer to the subsequent dedicated troubleshooting chapter.
Environment Cleanup and Target Registration
After completing the configuration, safely exit chroot and release the mount resources:
exit

sudo umount /mnt/debian-vm/dev /mnt/debian-vm/proc /mnt/debian-vm/sys
sudo umount /mnt/debian-vm/boot/efi  # If the ESP was mounted
sudo umount /mnt/debian-vm

# Release the loop device
sudo losetup -d /dev/loop0
Move the modified worker-02.Debian.img to the Controller node’s iSCSI storage pool directory and run the automated script to register the Target:
mv worker-02.Debian.img /pool1/iscsi_img/
cd /home/ipxe-all-ready
./iscsi-target-gen.sh
Diskless Boot Verification
Create a Worker VM with no local disk, configure it with the same MAC address as the target physical machine, and bind the hostname worker-02 in dnsmasq/dhcp-hosts.conf. After reloading the dnsmasq configuration, boot the Worker.
In the iPXE menu, select the normal Debian boot entry. iPXE will execute sanboot, loading GRUB from the iSCSI disk. Because the system has been modified internally via the Hook to inject the correct /etc/iscsi.initramfs identity configuration, the kernel will precisely connect to the dedicated Target during the initramfs stage and eventually enter the customized Debian desktop environment smoothly. The entire process requires no manual intervention, achieving true “instant-on”.
3.4 Route 3: Building a Clean Skeleton with debootstrap (Concept)
Engineering Positioning
Route 3 targets server scenarios that demand ultimate cleanliness, minimal footprint, and fully automated deployment. It complements Routes 1 and 2: the official installer handles “standard process validation”, VM image conversion handles “highly customized delivery”, while this route completely bypasses graphical and interactive installers—using debootstrap to directly pull base system packages from a mirror and assembling the most streamlined Debian system manually inside a chroot environment.
This route was fully proven during the exploration phase (see the retrospective at the beginning of Chapter 4); the main text will not expand on step-by-step operational commands—for a direct hands-on path, refer to the “Quick Deploy” series.
Core Concept
- Minimal assembly:
debootstraponly pulls the base component packages from the mirror, resulting in a bootable skeleton rootfs; subsequent software is installed on-demand inside thechroot. The system size and content are completely controllable, with no packages forced by an installer. - Precise injection of low-level dependencies: After skeleton assembly, iSCSI boot dependencies—kernel modules (
iscsi_tcp), user-space tools (iscsistart), and identity configuration (/etc/iscsi.initramfs)—are injected inside thechroot. This step shares the same Hook modification origin as Routes 1 and 2, representing the common difficulty of the three routes and the core of the methodology in Section 3.1. - Addressing stability: The root partition is always mounted via filesystem UUID, avoiding boot failures caused by device node drift in iSCSI topologies (addressing the third challenge in Section 3.1).
- Automation-friendly: The entire chain contains no interactive dialogs; everything is scriptable, naturally suited for batch generation of system images—this is the fundamental advantage that distinguishes this route from the previous two, and it is the genetic reason the later architecture inherits it.
Connection to the Current Architecture
The concept of “scriptable, batch construction” from Route 3 has already been implemented in a more elegant way in the current architecture: prepare the golden image once (including iBFT adaptation, see Chapter 4) → upload → instant clone via WebUI → boot on power-on, with zero per-worker customization and zero command-line operations throughout the entire process. For detailed hands-on instructions, please refer to the “Quick Deploy” series Debian-family Diskless Quick Deployment (Golden-Image Clone) — this route will no longer provide step-by-step operational instructions here.
Chapter Summary: From “no way” to Three Proven Routes
Looking back at the conclusion from the 2021 iPXE mailing list quoted at the start—“There is no way to do this with the standard Debian initrd.”—this chapter has completely filled this long-standing technical gap through three independent routes:
| Route | Engineering Positioning | Applicable Scenario | Cost |
|---|---|---|---|
| Route 1: Official netboot installer | Reproduce and verify standard network installation, observe and fix d-i’s configuration inheritance gap | Standard environments, reproducible baseline | Sensitive to network stability and hardware compatibility; limited customizability |
| Route 2: VM image conversion and customization | Complete local VM install, convert image, inject dependencies via chroot | Complex desktops, proprietary drivers, specialized software stacks | Requires virtualization platform and image conversion toolchain |
| Route 3: debootstrap clean skeleton | Bypass installer, manually assemble minimal system via chroot | Ultimate cleanliness, minimal footprint, full automation | Large assembly effort; this text only retains the concept, see Quick Deploy for operations |
All three routes share the same methodology—bypass official installer limitations, directly build or convert system images, deeply customize initramfs hooks via chroot—which is exactly the universal paradigm mentioned in Section 3.1 for conquering diskless boot on most Linux distributions based on initramfs boot mechanisms (Ubuntu, Arch Linux, RHEL family).
But at the finish line, one pain point remained unresolved: every machine’s initramfs required manual injection of iSCSI parameters. Every new Worker meant modifying /etc/iscsi/iscsi.initramfs once and rebuilding the initrd—one step short of true “instant-on”. How to eliminate this final step is precisely the theme of the next chapter.